Graphics Reference
In-Depth Information
the bones of the arm and head are connected through the spine, so they do not need a direct parent connection
to the master.
If you move the master bone and parts of your armature are left behind, those parts need to become children
of the master.
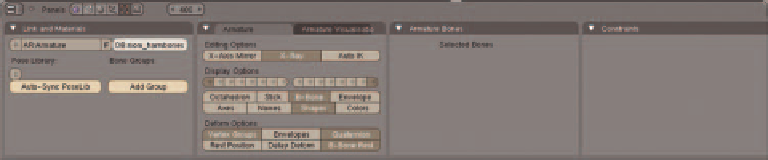
2. Test the basic rig and make adjustments. A good way to test the rig at this point is to set the armature
to the
B-Bone
visualization on the
Armature
panel of the
Edit buttons
, as in Figure 9.5. In B-Bone
mode, you can adjust the size of the bone visualization without affecting the bone length by using the
Alt-S
hotkey combination. Using this tool, you can adjust the B-Bones to approximate the propor-
tions of your character, as in Figure 9.6, allowing you to test your rig with a slightly more “character-
like” look before bothering with deformation and mesh binding.
Figure 9.5
Choosing B-Bone from the Armature panel
First, manipulate the control bones to see
how the rig responds. That will mostly
consist of moving the limbs and manipu-
lating the head and spine. Then, keyframe
some simple actions. You don't have to
go crazy and create beautiful animation,
but you should have your character per-
form some raw motions that are repre-
sentative of what they will do in the fi nal
production. If the character doesn't do
what you want at this stage, there is no
sense in proceeding any further. You'll
need to achieve a basic level of function-
ality before you move on. In the next
section, we'll analyze the mother rig and
discuss some specifi c techniques and the
results they can produce. You can save
the keyframed actions you create for later
rounds of testing, if you like.
Figure 9.6
The mother's rig with an Alt-S adjusted B-Bone visualization


Search WWH ::

Custom Search