Graphics Reference
In-Depth Information
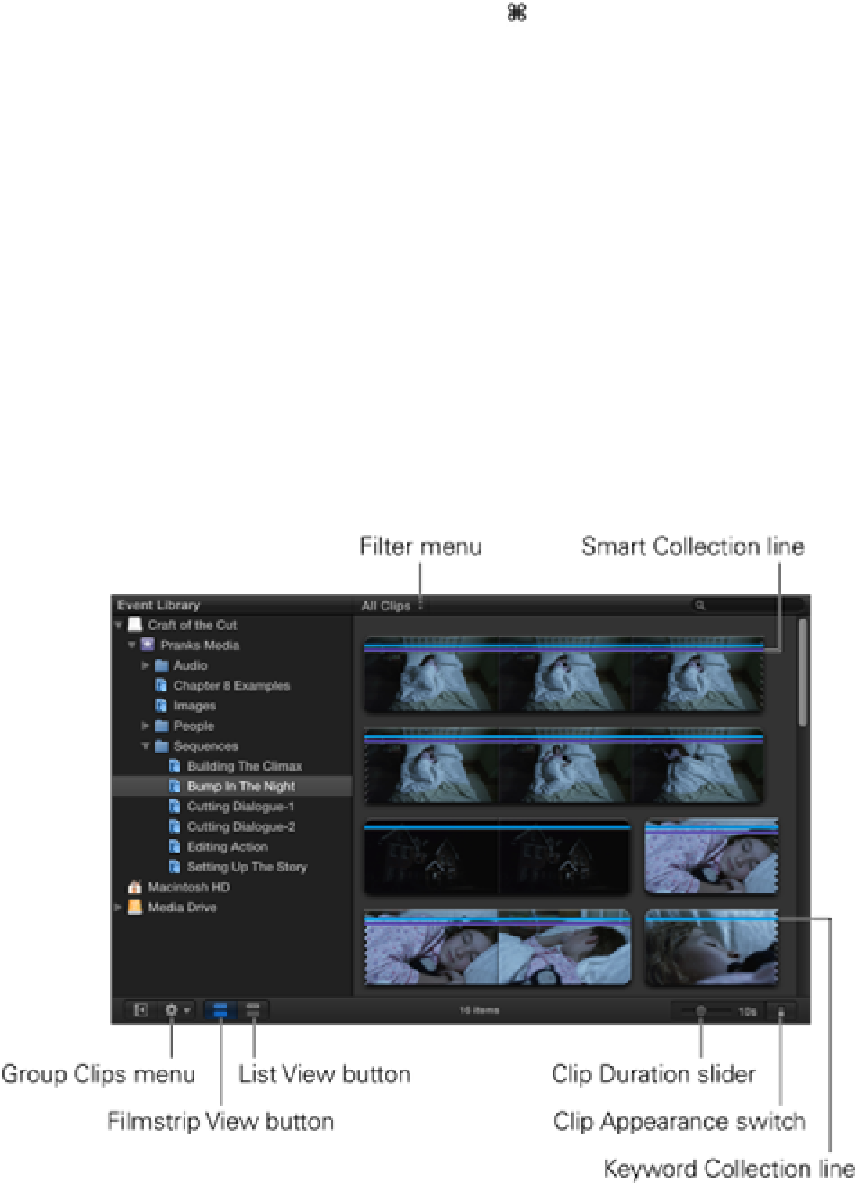
To switch the Event Browser to Filmstrip View, click the Filmstrip View button in the Toolbar, select
View
⇒
Event Browser
⇒
As Filmstrips, or press Option+ +1.
Displaying clips as filmstrips is useful when you need to visually skim through a clip to find a specific piece of
action in a shot. The slider at the bottom of the Event Browser controls how much of the filmstrip displays.
Moving the slider completely to the right, to the All position, displays the entire clip as one thumbnail, with the
thumbnail representing the entire duration of the clip. Moving the slider to the left extends the filmstrip into
several thumbnails, with each thumbnail representing the duration listed on the slider. Moving the slider to 5
seconds, for example, creates a filmstrip where each thumbnail represents a 5-second section of the clip. Mov-
ing the slider completely to the left displays the clips using thumbnails of half a second in duration. The smaller
the duration set with the slider, the longer the filmstrip becomes, with the filmstrip continuing on to several
rows in the Event Browser. When this is the case, the filmstrip displays a jagged edge at the end of each row.
You can see this clearly in Figure 4.1 where the first clip extends onto the second row.
You can make additional changes to how the thumbnails display by clicking the switch next to the slider. This
brings up the Clip Appearance panel (Figure 4.2) allowing you to adjust the height of the thumbnails to show
more or less of them in the Event Browser. You also can choose to display a clip's audio waveform by checking
the Show Waveforms check box. Audio waveforms are displayed as a blue area beneath a clip and are useful
when you want to visually find the beginning of a sound or piece of dialogue. To close the Clip Appearance
panel, click anywhere on the interface.
Figure 4.1
The Event Browser in Filmstrip View.