Graphics Reference
In-Depth Information
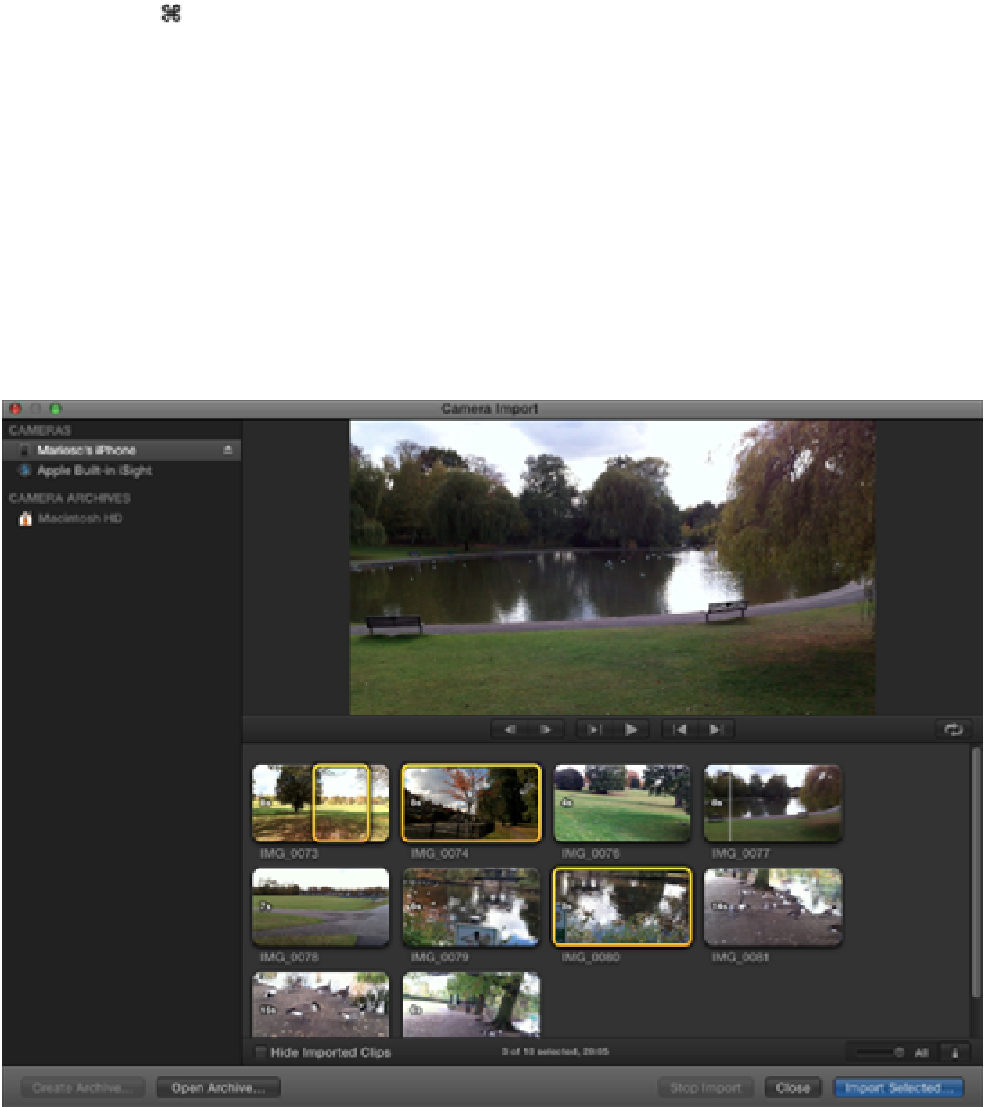
If no clips are selected in the Camera Import window, the Import All button is displayed at the bottom of the
window. Clicking this button imports all the clips from the camera. If you don't want to import everything, you
can pick clips by -clicking the thumbnails. A yellow selection box appears over each clip that you select for
import. The Import Selected button is displayed, and only the highlighted clips are imported. To deselect the
highlighted clips, click an empty section of the window.
You also can import a section of a clip by setting In and Out points for the area that you want to import or by
dragging the handles on either side of the yellow selection range. (Setting In and Out points is covered in
Chapter 4.)
Figure 3.10 shows the Camera Import window with an iPhone selected on the left. As you can see from the yel-
low selections around the thumbnails, three movie clips are selected for import into Final Cut Pro. The first clip
has had In and Out points set, so only the segment highlighted by the yellow selection range will be imported.
Clicking the Import Selected button brings up the familiar Import Settings window. From here, you can select or
create an Event and choose the analysis and transcoding settings that you require. Click Import to start the pro-
cess and close the Camera Import window.
Figure 3.10
The Camera Import window.
DSLRs