Graphics Reference
In-Depth Information
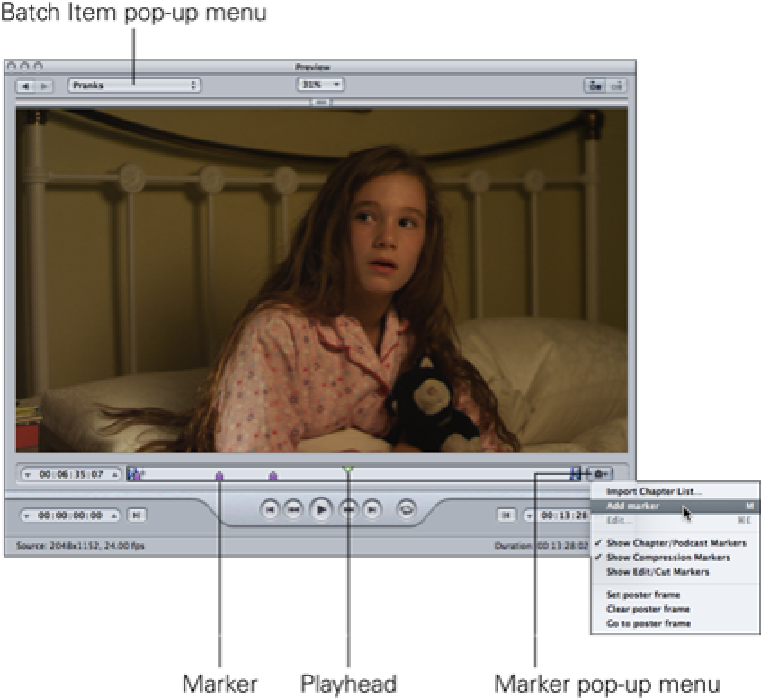
Figure 16.12
Preparing chapter markers for a DVD or Blu-ray disc in Compressor.
Let's walk through the steps for producing a DVD or Blu-ray disc with chapter markers:
1.
In Final Cut Pro, select a project in the Project Library and choose Share
⇒
Send to Compressor. Com-
pressor opens with a new job created and the Project added as the source media file.
2.
In Compressor's Settings window, open the Disc Burning folder and select either the H.264 for Blu-ray
preset or the MPEG-2 for DVD preset, depending on the type of disc that you're creating. Also, select the
Dolby Digital Professional preset, which will create a separately encoded audio track. Drag the presets onto
the job in the Batch window.
3.
Select the job in the Batch window and click the Job Action tab in the Inspector. From the When Job
Completes pop-up menu, choose Create DVD or Create Blu-ray Disc.
4.
With the job still selected in the Batch window, position the Preview Timeline's playhead to where you
want the first chapter marker to be added. Press M to add a marker or choose Add Marker from the Marker
pop-up menu. Name the chapter marker by choosing Edit from the Marker pop-up menu or pressing +E
and typing a name in the dialog box that appears, then choose Chapter from the Type drop-down menu.
Repeat this process for the rest of the chapter markers that you want to add.
5.
Submit the job from the Batch window. When Compressor finishes encoding, a dialog box displays with
the message
Please insert the media to burn the disc
. Insert the relevant disc to your
drive or Blu-ray burner to create the disc.