Graphics Reference
In-Depth Information
Figure 14.9
Choosing a new effect in the Animation Editor.
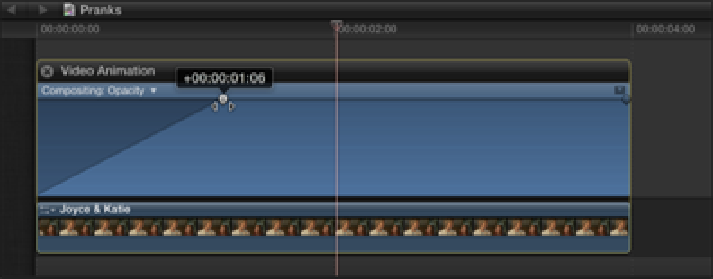
Figure 14.10
Creating fades using the Opacity control inside the Animation Editor.
Creating Effects for the Movie
In addition to the built-in effects, there are many plug-in effects available in Final Cut Pro, and you can find
them within the Effects Browser in the Toolbar. These work in the same way as the audio plug-ins and transition
effects that were discussed in Chapters 7 and 8. To open the Effects Browser, choose Window
⇒
Media Browser-
⇒
Effects or press +5. Effects are organized into categories such as Blur, Distortion, and Tiling, and additional
plug-ins can be purchased and installed from third-party vendors such as Red Giant Software and CrumplePop.
To preview an effect, simply select a clip in the Timeline and skim the cursor over the effect's thumbnail in the
Effects Browser. This allows you to see what the effect will look like when applied to that specific clip. To ap-
ply the effect to the clip, double-click its thumbnail or drag and drop it directly on the clip in the Timeline. The
effect's parameters can be found inside the Inspector's Video tab and can be adjusted in the usual way.
Flipping Shots
Let's see how this works in practice. In Chapter 1, we discussed how the opening shot had to be recorded with
the camera placed upside down, requiring the editor to flip the clip back in the edit. The clip in question is
Scene 1 Slate 1 Take 5, and because it's unlikely that we would ever use this shot upside-down, let's add the ef-
fect to the clip directly in the Event Browser. Any effect that we apply to a clip in the Event Browser remains
with the clip when it's added to the Timeline. In this way, the shot will be flipped the right way whenever we
want to use it in a sequence.
1.
Double-click the
Craft of the Cut
disc image to mount it, and launch Final Cut Pro.