Graphics Reference
In-Depth Information
placing the ball back in the toy box, and we can use this action to cut to the master just before she walks
over to the bed. Position the playhead at 8 seconds and 3 frames in the Timeline, and press Shift+D to over-
write Scene 11 Slate 22 Take 2, which will align the Out point with the playhead position on the Primary St-
oryline.
3.
Let's roll the edit point back to smooth out the transition between Katie's medium shot and the wider
master
.
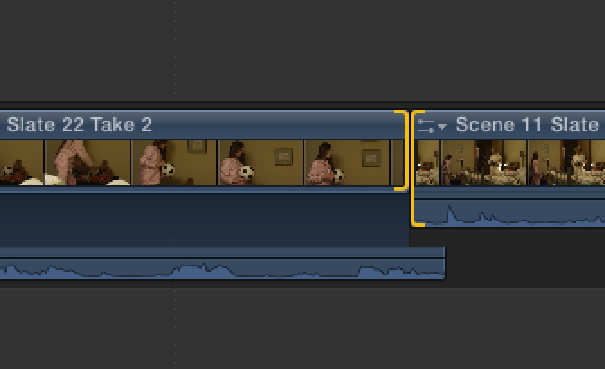
Select Scene 11 Slate 22 Take 2 in the Timeline and press Control+S to expand its audio. Press T to
bring up the Trim tool and select the video-only portion of both sides of the edit point between Scene 11
Slate 22 Take 2 and Scene 11 Slate 19 Take 3 (see Figure 10.20)
.
Roll the edit point to the left by 10 frames
so that the cut happens during Katie's action of placing the ball back in the toy box. Press A to switch back
to the Select tool, and press Shift+/ (forward slash) to play back the edit.
Figure 10.20
Selecting the video edit points before a roll edit.
4.
Select Scene 11 Slate 20 Take 1 in the Event Browser (first favorite) and play the clip. In this medium
shot, Joyce suggests a possible explanation for how the camera could be snapping photos by itself, continu-
ing the question raised in the previous scene. This would be a good shot to start the scene off. Click the
Dashboard so that it turns blue and enter
4.10
to place the playhead at 4 seconds and 10 frames on the
Timeline (over Scene 11 Slate 22 Take 2). Press Shift+D to overwrite Scene 11 Slate 20 Take 1, which will
align the Out point with the playhead position.
5.
Press the Home key to go to the beginning and press the Spacebar to play back the sequence. We still
have two extraneous clips at the start of the sequence that need to be eliminated. Select the first two clips in
the sequence and press Delete to remove them (see Figure 10.21). The edited sequence should now start
with Joyce's medium shot (Scene 11 Slate 20 Take 1).