Graphics Reference
In-Depth Information
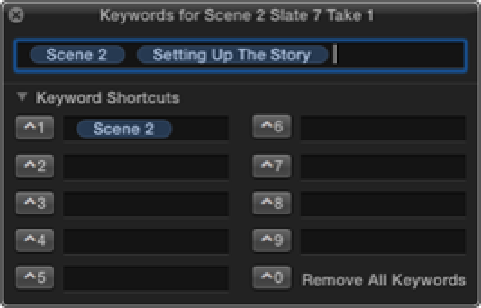
Figure 9.2
Using the Keyword Editor to tag the selected scenes with a Scene 2 keyword.
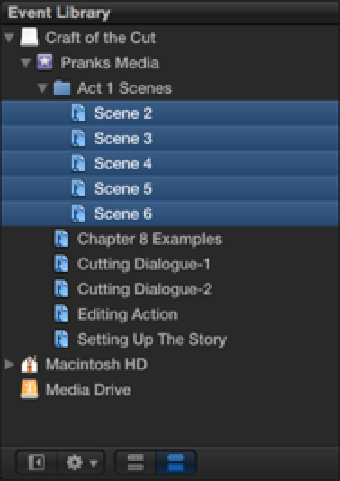
Follow the same procedure for Scenes 3 through 6 so that you have a Keyword Collection for each scene. When
you've finished, click the X in the Event Browser's search field to clear the search results. Control-click the
Pranks Media Event and choose New Folder from the shortcut menu. Name the folder “Act 1 Scenes,” and
place the five new Keyword Collections inside (see Figure 9.3) .
Figure 9.3
Organizing the Scene Collections inside a folder in the Event Library.
Evaluating the footage
In order to follow along with the examples in this chapter, you'll first need to rate some sections of the clips as
Favorites. -click on the Keyword Collections for Scene 2 and 3 to display the clips for these scenes in the
Event Browser, and mark the following sections as Favorites using these timecodes:
•
Scene 2 Slate 2 Take 4:
Between 03:10 and 10:04
•
Scene 2 Slate 4 Take 2:
Between 03:20 and 05:10
•
Scene 2 Slate 7 Take 1:
Between 02:06 and 06:17