Graphics Reference
In-Depth Information
overwrite edit places the source clip's In point at the In point of the selected range in the Timeline. To place the
source clip's Out point at the selected range Out point, you would perform a back-timed overwrite edit instead
(Shift+D). This method of three-point editing also is used for editing Connected clips to a Storyline.
The Range Selection tool has many other uses as well. You can use it to remove a selected area with the Delete
key or trim a selected area to the In and Out points of a selected range.
To trim to the selected area in a Storyline, make a selection on a clip or across a group of clips and choose
Edit
⇒
Trim to Selection or press Option+\ (backslash).
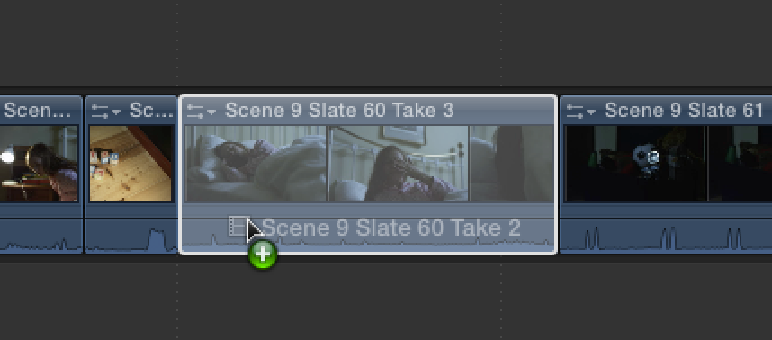
Replacing clips
As you flesh out the rough cut by adding and trimming clips, you may decide that a particular shot doesn't work
well in the context of the edited sequence and that you want to swap it with another take or a different shot en-
tirely. You can easily do this by performing a Replace edit. A Replace edit is similar to an Overwrite edit, ex-
cept that it replaces an entire clip in the Timeline. The simplest way to do this is to drag a clip from the Event
Browser directly onto the clip that you want to replace. As you hold the clip over the one that you're replacing,
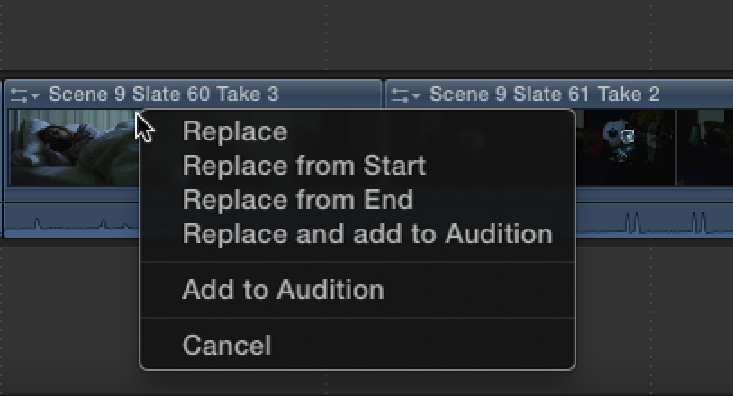
both clips turn white and display a plus sign icon (see Figure 6.10). Releasing the clip reveals a pop-up menu al-
lowing you to choose the type of Replace edit that you want to perform (see Figure 6.11).
Figure 6.10
Performing a Replace edit.