Graphics Programs Reference
In-Depth Information
The remaining four panes were created by using the Push/Pull tool on the
first pane extrusion, but by double-clicking while holding down the Ctrl key
(for Microsoft Windows) or the Alt key (for Mac). This applies the same Push/
Pull offset as in the previous operation, creating a new segment each time.
Doing this four times gave the required five panes. The canopy geometry was
then grouped and named.
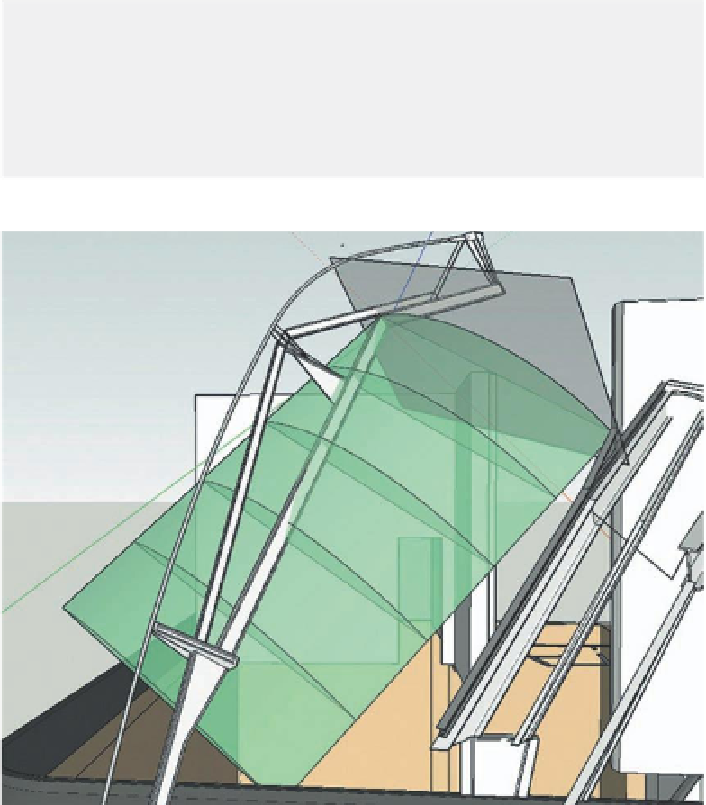
This is where the process got a bit tricky: The canopy needed to be rotated
into place so that it lay between the two main girders. This required quite a
few rotations to find the right spot (see Fig. 12.12).
Attention
When rotating the canopy into place, rotate it about only one axis at a
time, otherwise you are asking for trouble. This is where the click-drag
behavior of the Rotate tool to set a nonorthogonal axis of rotation comes
in really handy.
FiG 12.11
The canopy after extruding
it multiple times with the Push/Pull
tool.
Once the canopy was finally in its correct position, the overlapping edges
needed to be trimmed using the Intersection tool. The canopy group
was entered, and all the geometry inside was selected by triple-clicking
it and then right-clicking to give Intersect > Intersect with Selection.
The unwanted geometry was then simply trimmed using the Eraser tool
(see Fig. 12.13).

Search WWH ::

Custom Search