Graphics Programs Reference
In-Depth Information
The upper door stile is designed with mortises for connecting the rails. After
outlining with the Line tool, the mortises are created with the Push/Pull tool.
The stile also has the mitered bead on the inside edge and fits the mitered
bead on the rails.
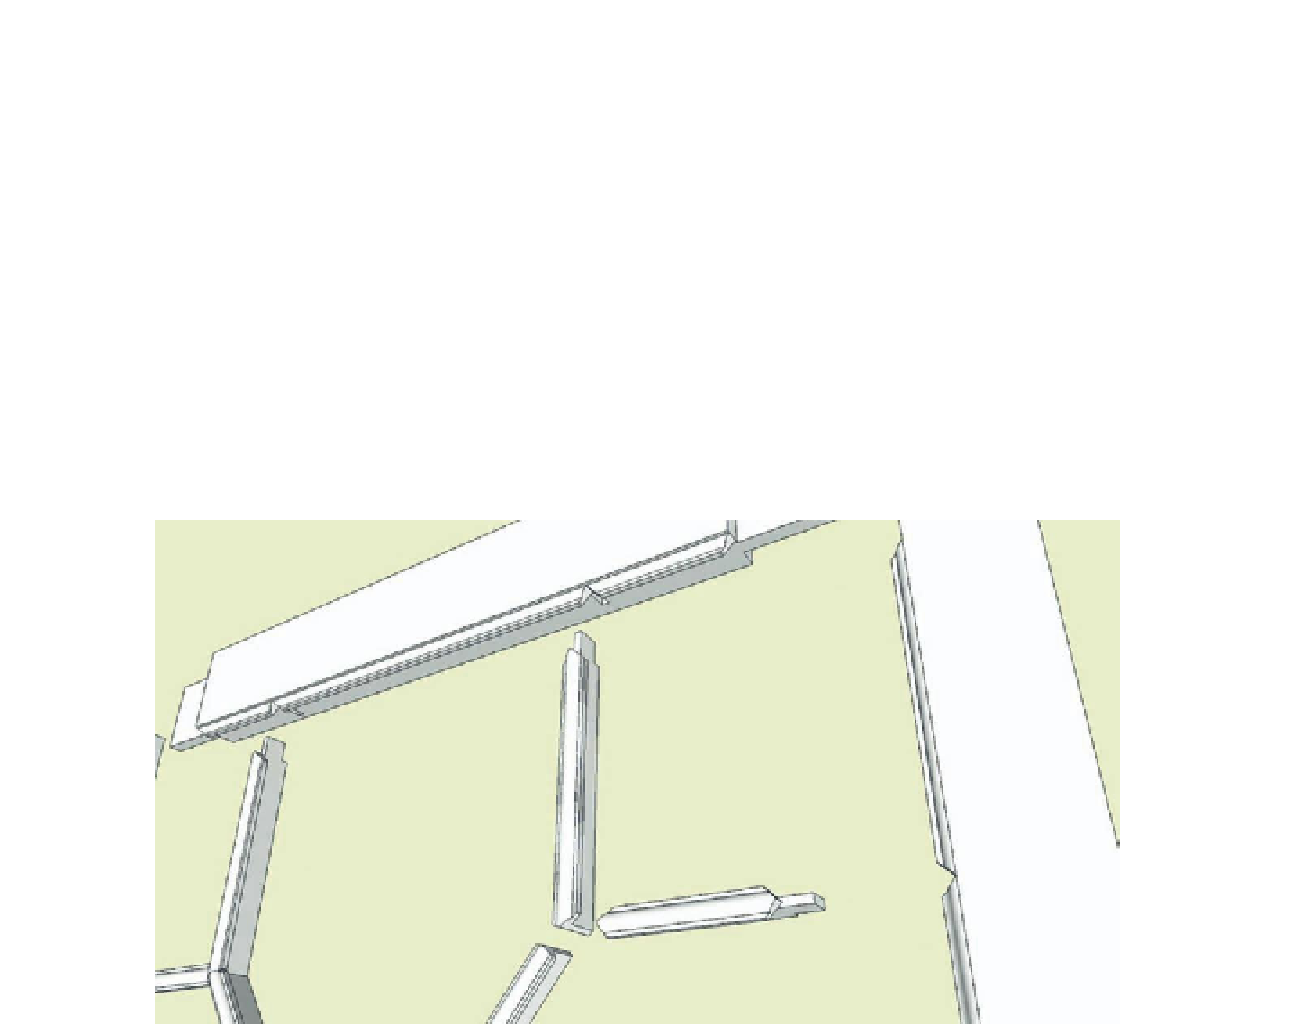
After completing the SketchUp model of stiles and rails, I moved on to the
muntins. I extruded a muntin shape using the Push/Pull tool. Then I worked
on the method of connecting muntins to the rails and stiles. The result is
shown in Figure 8.15, in which the muntin end is fitted with a small tenon that
fits into 1/8"-wide slots in the stiles and rails. Also, the bead end of the muntin
is mitered to a socket into a V-shaped cut at the edge bead of the stiles and
rails. These V-shaped cuts again required placement of an oversized rectangu-
lar face on 45°; then using the tool Intersect with Model, the V-shaped notches
are cut. You can see this connection in Figure 8.15.
FiG 8.15
Muntin connections.
Again I used SketchUp's capability to produce orthographic and cross-
sectional views to help with the construction of muntin shapes. Figure 8.16
gives an illustration and a full-sized template that I used in the shop.
After working out the muntin connections at the stiles and rails, I began
to develop the muntin-to-muntin angled intersections. After positioning
(in SketchUp) the muntin pieces into their respective places in the array, I
made the precise angled cuts on these muntin pieces at their intersections.
See the following close-up illustration (Figure 8.17) of one of these muntin
intersections. Again, I made the angled cuts on the end of the muntin pieces
Search WWH ::

Custom Search