Graphics Programs Reference
In-Depth Information
In addition to the mouse and keyboard, for all my modeling work I used 3D
Connexions' Space Explorer, a peripheral that allows me to navigate efficiently
around the model. In addition to the main joystick, it has several programma-
ble buttons to which you can assign SketchUp's tools and commands.”
Stage 1: Gathering the Data
Objective
: To bring together all the information needed for modeling
Data
: Plans of the project area, photographs of the site and of the built
context, surveys of the heights of the cornices of buildings surrounding
the square, aerial photograph of the site
Tools
: Pencil sketches, laser telemetry to measure the buildings
surrounding the square, digital camera
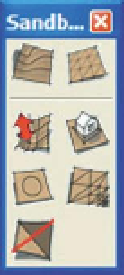
FiG 4.1
SketchUp's Sandbox tools.
First of all, a visit to the square and produced thorough notes of all the visible
elements that needed to be modeled. Once the notes were done, the survey of
cornice heights and the photographs of the square allowed the modeling of the
existing elements that would be conserved throughout the project: buildings,
spaces bordering on the square, street furniture or street lighting, etc.
The aerial photograph, taken from the community digital photograph survey
provided by the region of Wallonia, provided additional information on the
front-to-back depth of the buildings.
After this data was collected, two versions of the project plan were prepared:
• Apaperversiononwhichallthenecessarylevelsformodelingtheproject
were marked.
• AdigitalversioninDWGformatforimportintoSketchUp,whichwould
serve as a template for modeling.
Stage 2: Preparation and Import of Plan Files
Objectives
: Optimizing the files to be imported into SketchUp and
adjusting the import properties
Data
: Dimensioned drawing of the square
Tools
: AutoCAD LT to prepare the file in DWG format
To make the template, all the existing line drawings of the square were
merged into a single file. In order to cut down on the file size as much as
possible before it was imported into SketchUp, all the nonmodeling elements
were deleted. All the line elements were then transferred to a single layer.
The file was then purged in order to delete all inessential information: empty
layers, unused blocks, external references, etc.
Once the file was saved, it could be imported into SketchUp. In SketchUp's
menu bar, go to File > Import; from the drop-down menu in the resulting
dialog box, choose ACAD Files (*.dwg, *.dxf ), and click on the Options button.
In the dialog box that appears, choose meters as the unit from the Scale
drop-down menu and click on OK twice. The file is now ready to serve as a
template for modeling.
Search WWH ::

Custom Search