Information Technology Reference
In-Depth Information
Figure 7-6.
A search filter box at the top of a list
Finally, one can create a list with forms (Figure 7-7), allowing you to
create a nicely ordered form page inside a list view. Useful for
checkout pages, settings pages, and similar situations.
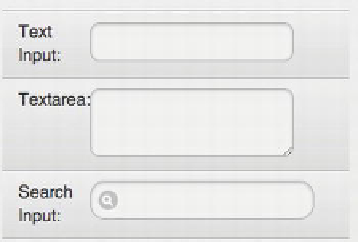
Figure 7-7.
Form elements within a list
The sky is the limit in terms of what you can do with lists! Now, back to the code…
Listing 7-4 Cont.:
The footer of the main page.
<div data-role="footer" class="ui-bar">
<a href="#about" data-transition="flip" data-role="button" data-theme="b">About</a>
<a href="#contact" data-transition="pop" data-role="button" data-theme="b">Contact</a>
</div>
</div>
<!-- /home -->
You'll notice that, at the bottom of the main page, we've created a footer section (which
looks like another black bar), and we've added two buttons. Creating buttons in jQuery
Mobile is very simple—fundamentally, it's just adding
data-role="button"
to any regular
HTML link.
The second two attributes—transition and theme—refer to how the page transition
should occur, and the color and styling of the button. We'll cover both of these in detail
in the next few chapters. We can also manually add a bit more styling to buttons by
specifying an icon. Where it makes sense, jQuery Mobile automatically adds icons to
buttons (i.e., by adding an X icon to a dialog close button). However, we can do this
manually if we like. For example, changing the preceding “Contact” link to read
<a href="#contact" data-transition="pop" data-role="button" data-theme="b"
data-icon="plus">Contact</a>