Java Reference
In-Depth Information
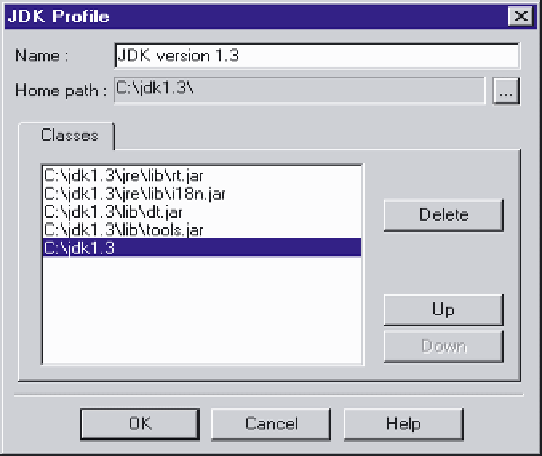
Figure 5. Setting the Classpath (Step 11)
9.
Click “Edit,” and in the Classes window of Figure 3, click “Add.”
10.
Choose “Add Path.” Select the folder containing the JDK documentation as illustrated
in Figure 4 and then click “OK.”
11.
The selected JDK directory will now appear at the bottom of the list in the Classes
window as depicted in Figure 5. Click “OK” to accept and, finally, “OK” in the
original window.
12.
The “Build” option from the menu in Figure A-1 can be used to compile and run a
program. One may wish to explore this and other functions using some sample Java
programs to ensure that the installation of the JDK bundle has been successfully
carried out.
step 3: Java 3d apI
1.
Visit “http://java.sun.com/products/java-media/3D/downloads/.”
2.
Click the “1.4.0_01 API Download” tab. In the next screen, click the “DOWNLOAD”
button under Download Java 3D API 1.4.0_01.

Search WWH ::

Custom Search