Java Reference
In-Depth Information
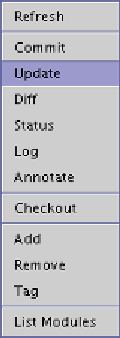
Figure 10.8
Cascaded menu with CVS commands
Using the integrated CVS is much like using the command line. If you
want to see the changes that you've made (before committing), use the
Diff
command. A window will appear showing the two different versions and
coloring the lines that have been added, deleted, or changed.
When you need to commit your changes, click the filename, then right-
mouse your way to
Commit
. A dialog window will appear for you to type in
the comment that you want to be associated with this change. (This comment
will appear in the
Log
command display).
To incorporate the changes others on your project may have made on the
file, use the
Update
command. A dialog box will display the CVS output
showing what was updated and if any merge conflicts occurred. (See Chapter 8
for more on this.)
The CVS commands in the menu, as we've described them so far, don't
allow you to add any options to the commands. They just run with the defaults.
What if you want to use some of the options available on the CVS command
line? Then hold down the Ctrl key just before your make your CVS choices.
You should see an ellipsis (“
...
”) appear after each CVS command for which
you can now select options (Figure 10.9).
Of course one of the great things about knowing the command-line ver-
sion (see Chapter 8) is that you're not limited to what the GUI tools will do
for you. If you can't find the option you want, just go back to a window with
a shell prompt,
cd
into the appropriate directory in your source tree, and type
the CVS command by hand. As noted earlier, NetBeans is smart enough to