Graphics Programs Reference
In-Depth Information
Adding the last bit of code tells Nuke to use an icon that contains the name
between the apostrophes. You don't need to include a full directory path to the
icon file name since Nuke will simply look for the icon in the .nuke directory.
27. Click the Save Script button in the Script Editor.
28. In the File Browser, navigate to your .nuke directory and click the menu.py file.
29. Click Save. When asked, approve overwriting the existing file by clicking OK.
30. Close Nuke and open it again to load menu.py.
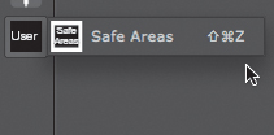
You should now have icons associated with your toolbox and Gizmo (
FIGURE
Figure I.9. Successfully adding icons to the user interface.
Other uses for menu.py
You can do many other things with menu.py. Things placed in menu.py are loaded on
Nuke startup, so it's a convenient place to add Python commands that will create things
you need all the time. There's a lot more about this in the Nuke documentation, and I en-
courage you to have a look.
First, you can add many more Gizmos to your already created User menu. You do that by
simply duplicating the third line and changing the name of the Gizmo, the hot key (if you
want any), and the name of the icon file.
But that's just skimming the surface. There are a lot more things you can add to the
menu.py file. One example is adding a format to the default format list. Adding a line like
the following one adds a format called 720p to the format list with all the right sizes. Just
add this line at the bottom of your menu.py (you can add a couple of spaces to separate
the Gizmo code and the format code) and then choose File > Save.
nuke.knobDefault("Root.format", "1280 720 0 0 1280 720 1 720p")
