Graphics Programs Reference
In-Depth Information
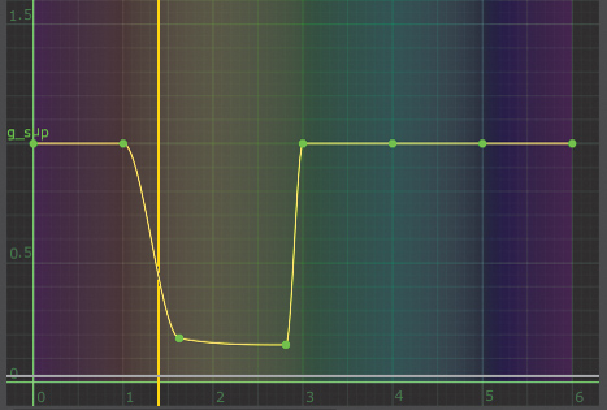
4. Ctrl-Alt-click/Cmd-Option-click the curve at about 1.5 to create a new point
there.
5. Bring down the point you just made to somewhere closer to 0 on the Y axis.
6. Togetridofmorespill,alsobringdownthepointattheXvalueof2tosomething
closerto0ontheYaxis.Thenclickitagainanddragittotherightsoit'satabout
2.8 on the X axis.
Figure 7.42. Suppressing green from various hues in the image using the
G_sup curve.
Thishastakencareofthespillonherfaceandinherhair.Nowyouhaveabranch
for the matte, ending with Merge2, and a branch for the fill, ending with HueCor-
rect1. You need to connect them. Here's how:
7. Click HueCorrect1 and insert a ShuffleCopy node after it.
Figure 7.43. Connecting the two branches with a ShuffleCopy node.
Search WWH ::

Custom Search