Hardware Reference
In-Depth Information
Building a graphical interface
However, it's not convenient to control the hacked device from the serial monitor. We are
now going to build a simple interface to control this device. The interface will be really ba-
sic and include two buttons: one to set the relay on and the other to set the relay off.
The interface is based on HTML for the interface itself, JavaScript to handle the com-
mands, and PHP to interface with the Arduino board. This interface is very similar to the
The following code will be a walkthrough of the different pieces of the interface. All the
files have to be located inside the same folder at the root of your web server folder. You can
find the complete code for this part inside the GitHub repository of the topic.
Let's first see the HTML file that contains the interface itself. Inside the HTML file, the fol-
lowing is the code for a button:
<button class="btn btn-block btn-lg btn-primary"
type="button" id="1"
onClick="buttonClick(this.id)">On</button>
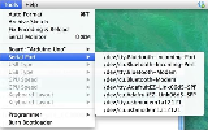
Inside the JavaScript file, we first define the communication type and the serial port. This
is where you need to change the value of the target to set it to your own serial port. To
know which port you need to select, simply go to the
Tools
menu of your Arduino IDE:
Inside this JavaScript file, this is the code you need to modify:
var target = '/dev/cu.usbserial-A102JJ6G';
var type = 'serial';