Database Reference
In-Depth Information
Aptana Plugin
The Eclipse IDE offers a convenient way to add new tools through their plugin platform. The process for adding new
plugins to Eclipse is straightforward and usually involves only a few steps to install a new plugin—as you will see in
this section.
An Eclipse plugin named Aptana provides support for server-side languages like PHP as well as client-side
languages such as CSS and JavaScript. This chapter and the other programming language chapters use the plugin to
edit both server- and client-side languages. A benefit of using a plugin such as Aptana is that it can provide code-assist
tools and code suggestions based on the type of file you are editing, such as CSS, JS, or HTML. The time saved with
code-assist tools is usually significant enough to warrant their use. Again, if you feel comfortable exploring within
your preferred IDE or other program, please do so.
To install the Aptana plugin, you need to have Eclipse installed and opened. Then proceed through the
following steps:
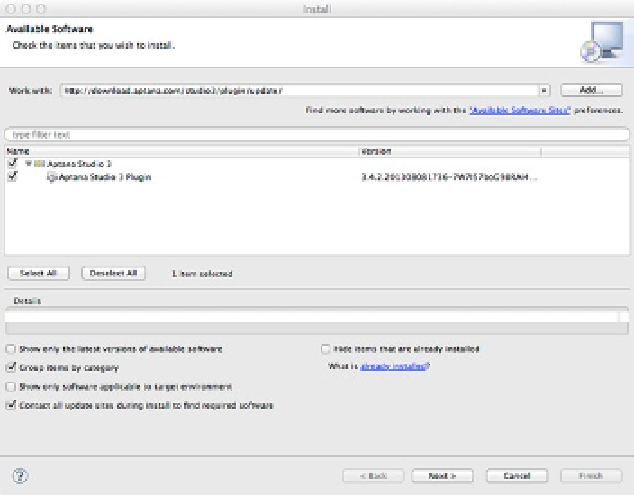
1.
From the Help menu, select “Install New Software” to open the dialog, which will look like
the one in Figure
11-2
.
into the “Work With” text box, and hit the Enter (or Return) key.
2.
3.
In the populated table below, check the box next to the name of the plugin, and then click
the Next button.
4.
Click the Next button to go to the license page.
5.
Choose the option to accept the terms of the license agreement, and click the Finish
button.
6.
You may need to restart Eclipse to continue.
Figure 11-2.
Installing the Aptana plugin