Graphics Programs Reference
In-Depth Information
Volumes
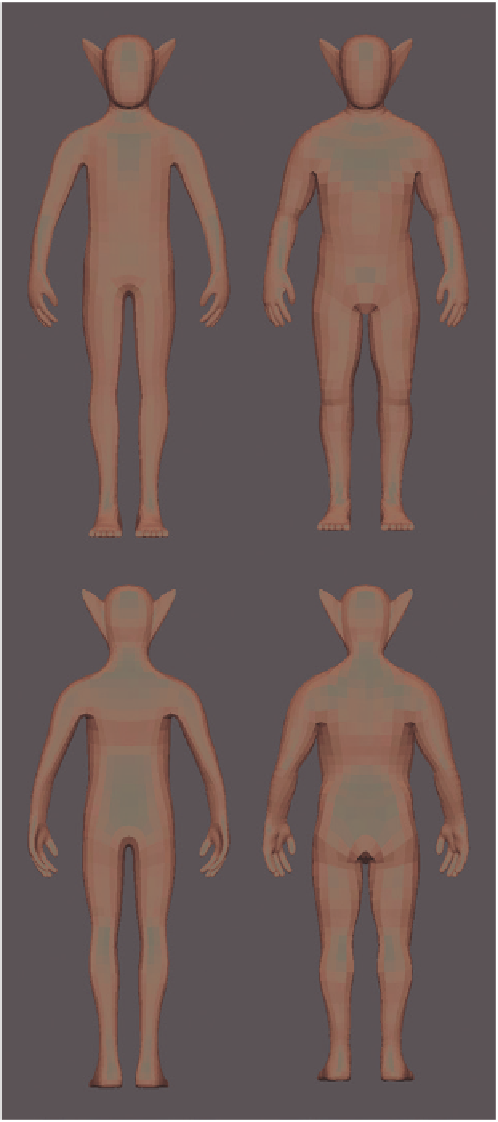
I began by adding volume to the legs and arms
with the Inflate tool (see Figure 6-19). The Inflate
tool is particularly handy at low subdivision levels
for enlarging basic masses and giving them a nice
rounded shape. The Clay tool is also handy for
building up mass in a specific place. (It's easy to
make forms thinner again with the Smooth tool or
with the Inflate tool in Subtractive mode.)
On the Bat's torso, I began separating the bulk
of the ribcage or chest from the pelvis and adding
some muscle mass on the back for the shoulders.
The Bat Creature is a character with wings coming
out of its back, so large muscles on the back are
expected.
Planes
Next, I began sculpting the figure's basic planes.
Because I was adding more definition at this point,
I first added a few more subdivision levels, bringing
the overall polycount to a few hundred thousand
polygons. The aim here was first to find the bony
landmarks of the body, such as the top and bot-
tom of the ribcage, the iliac crests of the pelvis, the
knees and elbows, and the skull (see Figure 6-20,
Landmarks).
As a first step, you can roughly mark these
points with a light impression from the Clay brush.
Next, you can place the secondary forms of the
major muscle groups using these landmarks as a
guide. To do this, simply add and subtract mass
with the Clay brushes (Figure 6-20, Masses). Then
you can begin flattening these masses out into the
main planes of the body using the Flatten, Scrape,
and Fill brushes (Figure 6-20, Planes). Using the
Crease brush at this stage will allow you to create
better divisions between planes in Subtractive mode
(the default behavior for this brush); this brush can
also be used in Additive mode to add sharp edges to
planes that face outward.
A good way to plan and keep track of the details
you want to create is to sketch the muscle groups
with Blender's grease pencil, using the Surface
drawing setting (see Figure 6-21). In Object mode
and with your mesh selected, add a new grease
pencil layer, set the draw mode to
Surface
, and
then draw strokes on the surface of your mesh by
Figure 6-19: Bat Creature volumes: Subdivided base mesh
before sculpting volumes (left) and the basic large volumes
roughly added using the Grab and Inflate brushes (right). At
this stage, I was concerned with refining the overall shape
of the character into one with the right volumes and propor-
tions, mainly by inflating and deflating or by smoothing out
the forms at a low subdivision level. I could also tweak certain
proportions in the base mesh.

Search WWH ::

Custom Search