Graphics Programs Reference
In-Depth Information
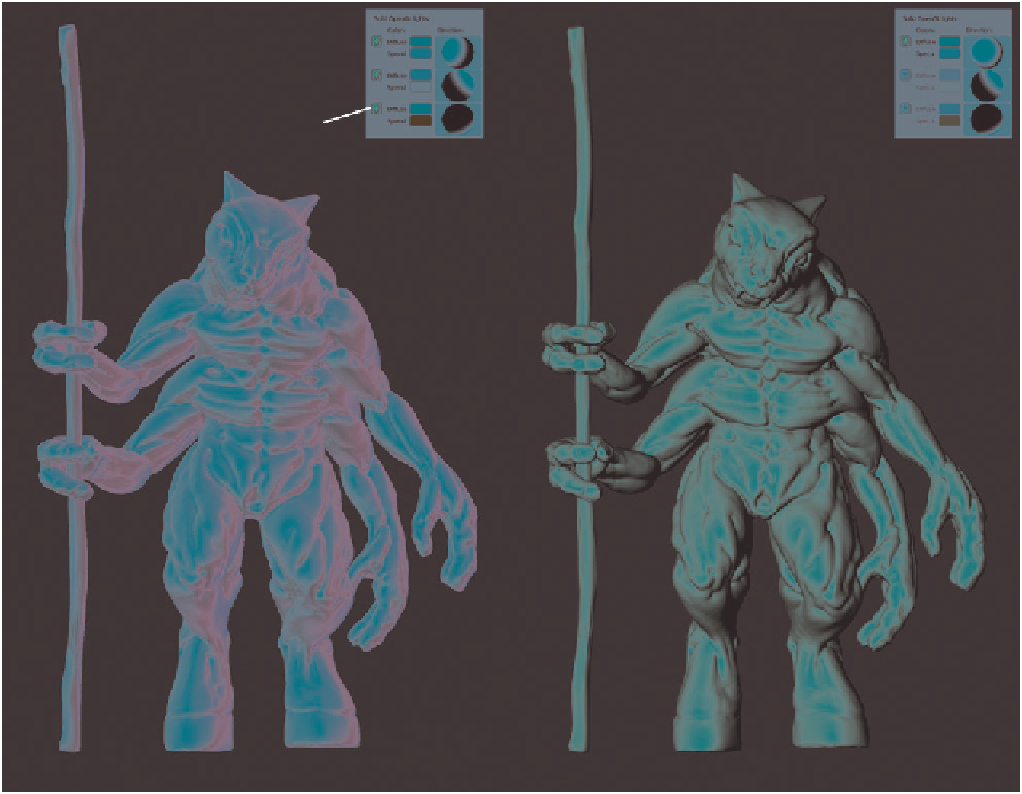
Preferences and, in the System tab, locate the Solid
OpenGL Lights settings, as shown in Figure 6-13.
These settings give you three independent “lights”
that determine how meshes are shaded in Blender's
default solid shaded view. You can turn these lights
on and off using the lightbulb icon, adjust their dif-
fuse and specular colors with the color pickers, and
change the direction from which they light the mesh
using the spheres on the right.
To make the lighting more amenable to sculpt-
ing, I turned off the second and third light sources
and set the first light source to point straight at the
mesh, giving it a slight tan color. This resulted in the
shading on the right in Figure 6-13, which is more
directional and gives a better idea of the shape of
your mesh while sculpting.
Tweaking OpenGL Shading
While it's nice to sculpt with MatCap materials,
once you get into the millions of polygons with
your sculpts, Blender's performance may begin to
suffer. Switching back to Blender's default OpenGL
shading (that is, solid shading) is much faster, but
it's quite evenly illuminated and not brilliant for
sculpting. Fortunately, you can easily tweak the
look of this shading in the System tab of the User
Preferences, making it more appropriate for sculpt-
ing and increasing the amount of subdivision you
can squeeze out of your computer while still main-
taining reasonable performance.
In Figure 6-13, I've tweaked Blender's standard
OpenGL lighting. To do this yourself, open User
Turn light
o n/o ff
Diffuse/Specular
color
Light
direction
Figure 6-13: Blender's default OpenGL shading is very versatile and much faster than GLSL MatCap shading, especially for
higher polygon counts. By adjusting the positions and colors of the three available lights, you can create a variety of lighting
setups that are more suitable for sculpting than the default is.

Search WWH ::

Custom Search