Graphics Programs Reference
In-Depth Information
Layers
As a layer-based image editor, GIMP lets you create
an image from multiple layers composited on top of
one another, combining elements from each. The
Layers dialog shows you all the layers in your image
and allows you to edit their ordering and how they
are combined. By default, each layer replaces the
one below it, with any transparent parts letting the
layer underneath show through. However, you can
also choose from several other ways to blend layers
using the Layer Mode drop-down menu at the top of
the Layers dialog.
When you paint on the canvas (or use any
other tool or filter), your strokes are painted onto
the active layer (highlighted in the Layers dialog).
We'll cover layers in more detail in Chapter 11.
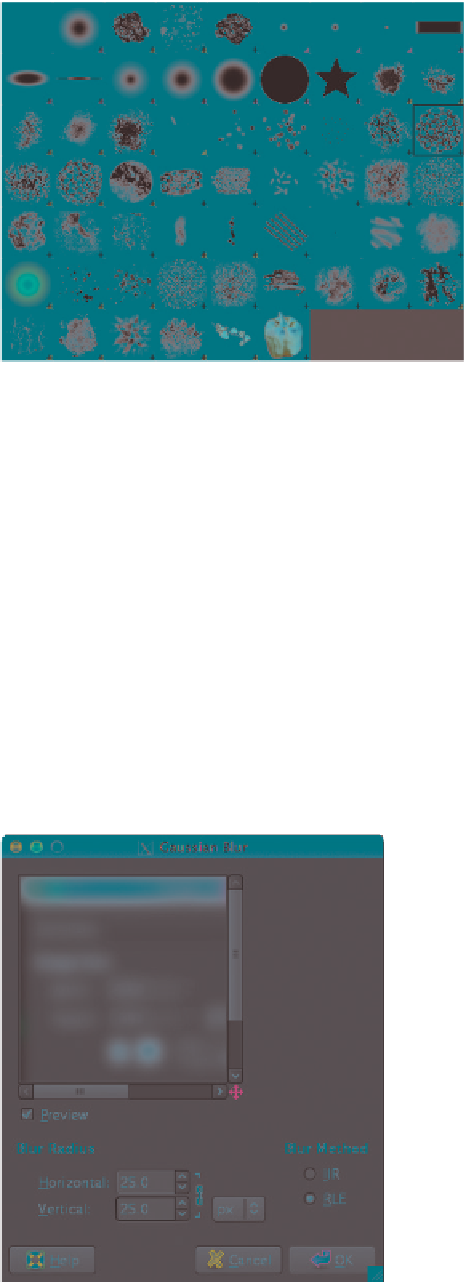
Figure 2-3: Some of GIMP's brush shapes
sharpening images, removing or creating noise, and
distorting and deforming images. You will also find
filters that apply artistic effects and ones that allow
you to create completely new images and patterns
from scratch.
Choosing a filter from the Filters menu usu-
ally brings up a dialog with some options that
adjust how the filter works. For example, if you
select the Gaussian Blur filter, the dialog should
contain options for the radius of the blur and the
blurring method used, as well as a small preview
(see Figure 2-4). Clicking OK in this dialog applies
the filter to the whole image. (We will use some of
these filters when painting textures in Chapter 11.)
Selections
One way to restrict the pixels you paint on is to use
GIMP's selection tools. With these, you can draw out
a selection you wish to work on within the current
layer. Brushes, filters, and other tools will then affect
only the selected pixels (see Figure 2-5). Selections
come in handy when you want to work on an isolated
part of an image. They also let you copy (
ctrl
-C)
and paste (
ctrl
-V) parts of your image or split part
of an image off into a new layer. We'll cover these
tools in more detail in Chapter 11.
To cancel a selection, click outside of it with a
select tool. You can also invert it (
ctrl
-I), swapping
the selected and unselected areas. You can add to or
subtract from your current selection by holding the
shift
or
ctrl
keys while dragging out a selection.
In later chapters, we'll look at other ways to work
with selections using tools like GIMP's Quick Mask
feature.
Saving and Exporting
GIMP can open almost any image format, but once
you have an image open, it distinguishes between
saving an image (
ctrl
-S), which it does only in its
native
.xcf
format, and exporting it (
ctrl
-E) to a
more conventional image format, such as a JPEG or
Targa. You can choose the image format to export
to by adding the correct suffix to the file name (for
example,
.jpg
for JPEG and
.tga
for Targa) or by
selecting it manually from the list at the bottom
of the Save dialog (see Figure 2-6).
When working on the textures and other images
for the projects in this topic, I both save and export
Figure 2-4: Using filters. The Gaussian Blur filter
is shown here.
Search WWH ::

Custom Search