Graphics Programs Reference
In-Depth Information
sizes. For example, soft shadows don't need
high-resolution shadow buffers, and crisp,
hard-edged shadows don't need lots of samples.
Once you have lighting you like, try to deter-
mine which settings you can turn down without
affecting the look of your lighting in order to
speed up renders.
In Review
In this chapter, we looked at lighting for both
Blender Internal and Cycles, beginning with a dis-
cussion of the different types of lamps that Blender
offers and their functional differences in Blender
Internal and Cycles. We examined different meth-
ods for dealing with shadows, both ray traced and
buffered, and explored their advantages and dis-
advantages. We also looked at Blender's World set-
tings and how they impact lighting.
For the Bat Creature, we covered creating a
three-point light setup to give dramatic flair to the
model and looked at how best to set up shadows for
characters with hair. For the Spider Bot and Jungle
Temple projects, I lit the scenes using a mix of lights
and mesh-emitter objects to create dynamically lit
scenes. When I worked with lighting in Cycles, the
Cycles render preview came in handy for getting
real-time feedback on the effect of our lights. And
even in Blender Internal, I used GLSL shading to
get some rudimentary feedback on the lighting and
shadows in the scene.
In the next chapter, we'll render the scenes
and do some final color correction and composit-
ing for our projects. I will cover render options for
both Cycles and Blender Internal and how best to
optimize render times while getting the best pos-
sible renders. We'll look at node-based compositing
using Blender's compositor, as well as creating back-
grounds and doing final tweaks in GIMP.
Make the most of shadow buffers.
The resolution
of a shadow-buffer lamp is spread out over the
lamp's cone. To make the most of it, restrict
the lamp by reducing its angle to cover only
the model (go to Size under Spot Shape in the
Object Data tab) and to make sure that you're
not wasting any of the shadow buffer's resolu-
tion on areas that aren't casting shadows.
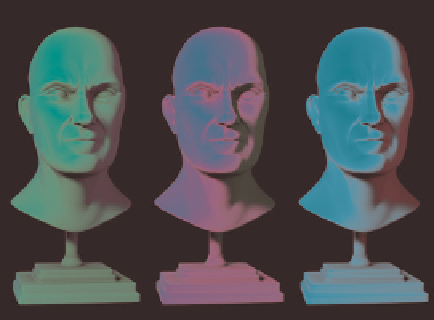
Use opposing colors.
Use color theory to your advan-
tage when lighting. Often, opposing colors (pairs
of colors on opposite sides of the color wheel,
such as orange and blue or green and purple)
work well when used as opposing key and fill
lights (see Figure 13-23). Natural light often fol-
lows this example: Sunlight is orange, while scat-
tered light from the atmosphere is blue.
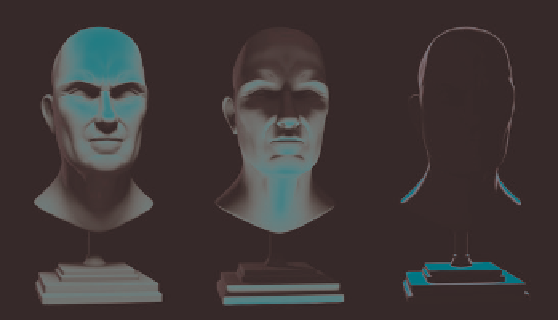
Directional lighting and characters.
The direction
you choose to light a character from can change
the way it's perceived. Lighting from above often
looks regal and dignified, while lighting from
below looks scary and menacing. A few examples
are shown in Figure 13-24.
Figure 13-23: Opposing colors often make for pleas-
ant lighting schemes. Left to right: Orange key light
and a blue fill, blue key light and an orange fill,
green key light and a purple fill.
Figure 13-24: Lighting direction changes how we perceive charac-
ters. Left to right: Lighting from above looks dignified, lighting from
below looks spooky, and a rim light from behind gives an ominous
silhouette.

Search WWH ::

Custom Search