Graphics Programs Reference
In-Depth Information
below it. White areas are applied 100 percent if
the overall opacity of the layer is also 100 percent
(otherwise the two are multiplied together), black
areas are completely masked out, and values in
between blend between the two extremes.
When you add a mask to a layer (as we did
above), it appears to the right of that layer's thumb-
nail in the Layers dialog. To edit the new layer mask,
click its thumbnail, and you can paint on it just as
you would on a normal layer (except that it allows
only black and white values, so tools and filters that
work with RGB colors are not available).
Click the thumbnail for the layer to go back to
painting normally (the thumbnail of the active layer
or mask is outlined in white). You can apply the
effect of a layer mask by right-clicking the layer in
the Layers dialog and choosing
Apply Layer Mask
.
This will apply the mask to the layer itself, making
masked areas transparent.
Creating Specular and Hardness Textures
With our diffuse texture painted and the seams
cleared up, it's time to create our specular and hard-
ness textures. The
specular texture
defines the color
and intensity of our creature's specular reflections:
Dark areas will look matte, and bright areas will
look shiny. The
hardness map
determines how soft
the highlights are: Low values create soft, spread-
out reflections, and high values create smaller, more
intense highlights.
To create these textures, we can duplicate and
modify the layers of the diffuse map. We'll work
in the same GIMP
.xcf
file to create these textures,
which will give us ready access to the layers we've
already created.
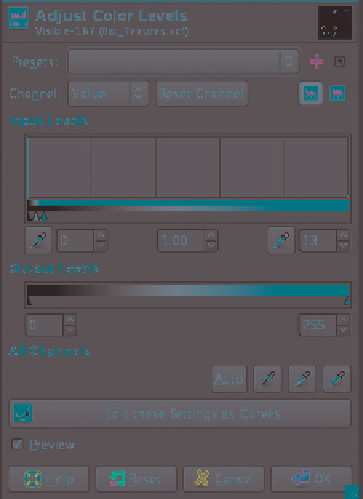
Figure 11-16: Altering the values of a layer with
the Levels tool. Note how the handles for the
input levels have been bunched up at the left
side of the graph to increase the brightness of
all but the darkest values to white.
5.
Disable the merged layer's visibility in the Layers
dialog and set the Blend mode for the fixed
layer back to
Normal
. Then, to add a layer mask
to the fixed layer, right-click on it and choose
Add Layer Mask
. Choose white as the color of
the layer mask and then click
Add
to create it.
6.
Press
ctrl
-V to paste in the mask we created
from the merged layer as a “floating” layer—
one you can continue working on and moving
around before anchoring it and applying it
to the layer you pasted it into. Since we don't
need to make any changes to it, press
ctrl
-H
to anchor it.
Layer Groups
To make it easier to manage creating specular and
hardness textures, I used
layer groups
to organize
my layers. Layer groups allow you to group layers
and expand and collapse those groups in the Layers
dialog, making it simpler to keep things organized.
To create a layer group, right-click on a layer in the
Layers dialog, and choose
New Layer Group
or
click the folder icon at the bottom of the dialog. You
can then drag other layers onto the group layer to
assign them to the group. To organize my textures
for the Bat Creature, I created three layer groups:
one for the diffuse texture, one for my specular tex-
ture, and one for hardness (see Figure 11-18).
Our fixed image is now masked so that only the
areas that differ from the original texture show over
the layers below. This more or less completes the
creation of our diffuse texture (see Figure 11-17), so
save the image as an
.xcf
file and export a new
.tga
image of the diffuse texture.
Layer Masks
A
layer mask
is a black-and-white image that deter-
mines how a layer in GIMP mixes with the layer
Search WWH ::

Custom Search