Graphics Programs Reference
In-Depth Information
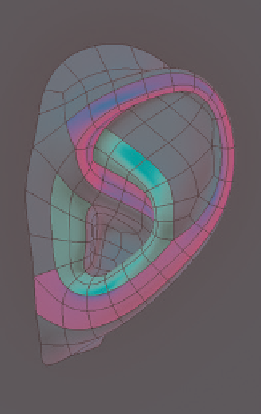
antihelix (the outer and inner curved parts of
the ear, shown in blue and green respectively in
Figure 7-23) with edge loops that run down into
the earlobe, we can make it easy to define the ear's
overall structure. The other main feature of the ear
is the ear canal. In addition, it is sometimes handy
when constructing the ear to try to have a single
edge loop encircling the ear to make it easier to
attach the ear to the head. One way to do this is to
construct the ear as a separate mesh initially and
then create a loop around the outside before plac-
ing the ear and connecting it with the head.
Figure 7-21: The mouth. Note at the corners of the
mouth that the edge loops on the surface of the lips
bunch up and flow around inside the mouth. Try to
keep the same edge or face loop flowing around
the outline of both the upper and lower lips. The
easiest way to do this is to start with this edge loop
and work inward.
The nasolabial fold is an important feature of
the nose and is most obvious in snarling or older
faces. Adding a face loop that runs over the bridge
of the nose and down the sides of the mouth, con-
necting under or at the chin, allows us to define
this area (see Figure 7-22). The bridge of the nose
is formed simply by bridging across between the
loops encircling the two eyes.
Figure 7-23: The ear
In Review
In this chapter, you've learned how to retopologize
meshes with arbitrary topology, be they high-poly
sculpts or a collection of separate primitives, to cre-
ate smooth, clean topology that subdivides well.
We've discussed ways to use Blender's Snapping
tools to retopologize meshes, as well as alternative
methods, such as the Bsurfaces add-on and the
Shrinkwrap modifier. We moved on to using these
tools to retopologize the meshes we created in ear-
lier chapters with new, better topology.
In Chapter 8, we'll unwrap this new topology
to provide it with texture coordinates before bak-
ing and painting textures for our final models in
Chapters 10 and 11. The improvements that we've
made to our models in this chapter will make that
process easier and will also improve our render
times when we reach Chapter 14.
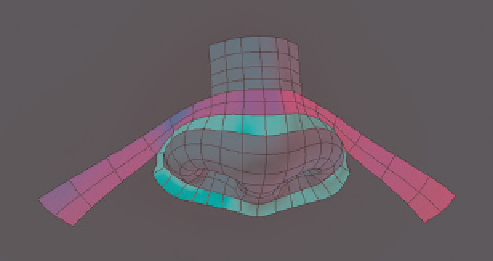
Figure 7-22: The nose. Here, the face loops running along
the nasolabial fold and over the bridge of the nose are high-
lighted in blue, and a face loop running around the nostrils
and the tip of the nose is highlighted in green. It is also useful
to create face loops around the inside of the nostrils.
Ears
Ears are highly variable from person to person, but
their overall construction is reasonably constant.
Because the ear is mainly cartilage with no muscu-
lature or articulation, it is a pretty static feature of
the head and thus a good place to hide awkward
triangles if necessary. By defining the helix and

Search WWH ::

Custom Search