Graphics Programs Reference
In-Depth Information
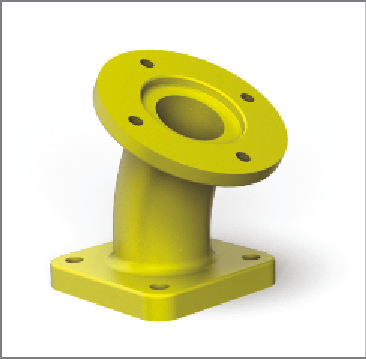
FIGURE 3.1
The 30-degree adapter you will build
Creating a Sketch
When Inventor begins a new part file, it starts in the sketching environment by
default.
Certification
Objective
1.
Open the New File dialog box from the Application menu, the Quick
Access toolbar, or the Launch panel of the Get Started tab.
2.
Select the Metric folder under Templates, and double-click the
Standard(mm).ipt
template.
Inventor doesn't assume you will sketch or on what plane you
would like to begin sketching.
3.
Click the Create 2D Sketch tool in the Sketch panel.
Three planes appear in the center of the design window. You must
select one of these sketch planes.
4.
For this exercise, select the plane that is parallel with the x- and y-axes,
as shown in Figure 3.2
After the plane is selected, Inventor aligns your view to look directly
at the sketch plane.
4.
Start the Line tool. Right-click in the Graphics window, and select the
Line tool from the marking menu or find it in the Draw panel.
5.
Begin the line segment by clicking below and to the left of the projected
center point (the green dot above the line segment shown in Figure 3.3)
of the part.


Search WWH ::

Custom Search