Graphics Programs Reference
In-Depth Information
17.
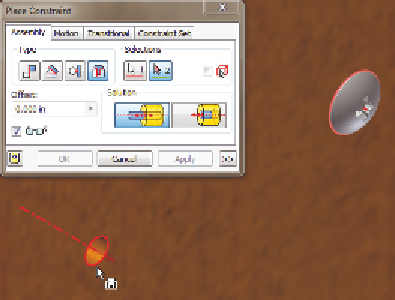
Use the Change Component tool to change the c15-11-03 part back to
c15-11-01.
18.
A warning dialog box will appear, letting you know that two con-
straints have failed. Accept this.
FIGURE 15.13
Reusing a screw by applying
another constraint
Now the assembly is prepared for a conversion to an iAssembly. It is not abso-
lutely necessary to create the constraints for the knob ahead of time. It is help-
ful to build several configurations in one step, but for your products, you might
choose to create iAssemblies one member at a time, adding parts as you go.
Converting an Assembly to an iAssembly
All the pieces are in place, and the assembly constraints are ready to be used.
Naming the constraints has the same benefit as naming parameters in an iPart,
but it makes them much easier to locate in the iAssembly Author dialog box.
1.
Make certain that the 2013 Essentials project file is active, and then
open
c15-03.iam
from the
Assemblies\Chapter15
folder.
2.
Click Create iAssembly in the Author panel of the Manage tab.
The iAssembly Author dialog box (Figure 15.14) opens, and as you
might expect, it will look a lot like the iPart Author dialog box. The
main focus of this dialog box is to specify which iPart member to
show in the assembly and whether any constraints need to change.


Search WWH ::

Custom Search