Graphics Programs Reference
In-Depth Information
7.
Deselect the Select All option in the Feature Types panel. This clears
all the options.
8.
Select the Fillet option, and then click and drag a selection window
around the entire part in the Graphics window or pick the icon for
the Solid model from the Browser.
9.
Once the entire model highlights, click OK in the Feature Recognition
panel or right-click in an open area of the Graphics window and pick
OK from the compass of the marking menu.
Several fillets will appear in the Browser. You can use these icons
to select fillets. Once a fillet is selected, you can select a feature to
edit or remove from the model.
10.
While holding the Ctrl key, pick each of the fillets in the Browser, as
shown in Figure 14.8.
11.
Once they're selected, right-click and click Delete in the marking
menu. You can select the fillets in multiple steps if needed.
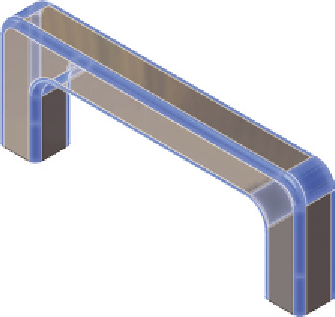
FIGURE 14.8
Select all the fillets on the part.
12.
Once the fillets are gone, the model should have only sharp edges.
Before you make further edits, let's change the unit of measurement.
13.
In the lower-right corner, hover over the icon that shows the current
units (cm), and click mm from the drop-down menu (Figure 14.9).
The Simplify tool
in the Simulation
panel can be used to
select or even delete
features from the
Browser based on
their size.
Now that you've simplified your model, you can begin to change its size and
shape. Inventor Fusion has several options for moving faces on a par. You can
add features as well as edit them, and the changes you make will be carried back
into Inventor when you are finished.


Search WWH ::

Custom Search