Graphics Programs Reference
In-Depth Information
Prior to Inventor
Fusion, you could do
basic solid editing
using tools built into
Inventor to edit base
solids. This option
is still available
through the applica-
tion options.
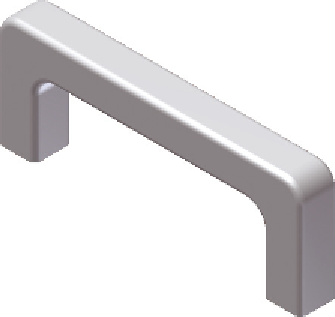
FIGURE 14.7
The model after import
into Inventor
Editing Imported Data
To edit the base solid, you will use an application that was installed with Inventor,
called Inventor Fusion. Inventor Fusion offers many options for editing base solids.
1.
Click the Open file tool, and if need be, switch the Files Of Type value
back to Autodesk Inventor Files.
2.
Make certain that the 2013 Essentials project file is active, and then
open
c14-02.ipt
from the
Parts\Chapter14
folder.
3.
Locate the imported data icon, which includes the name of the
imported file, in the Browser; then expand it, right-click the Base1
element, and select Edit Solid in the context menu.
When Inventor Fusion
is used to edit an
Inventor part, the
changes can be saved
to a DWG file; there-
fore, an Inventor
user can review
the changes before
adopting them.
4.
When the instructions for returning to the Inventor appear, read
them and then click OK.
5.
The Inventor session will be minimized, and Inventor Fusion will
open with the model geometry in it.
In the next two exercises, you will use several features that are
unique to Inventor Fusion.
For the most part, the Inventor Fusion interface is similar to Inventor.
There's a Ribbon, a Browser, a ViewCube, and a Navigation Bar.
6.
Start the Find Features tool from the Manage panel of the Home tab.
Starting the Find Features tool opens a contextual tab on
the Ribbon where you select which features you want to find in the
selected geometry.


Search WWH ::

Custom Search