Graphics Programs Reference
In-Depth Information
4.
Change the option for dealing with a non-Inventor DWG file to Import,
and click OK.
5.
Now click Open to begin the translation steps.
6.
When the DWG/DXF Wizard appears, click Next.
7.
In the next dialog box, select the geometry to be imported. In this
case, you want the entire drawing, so make sure the All check box is
selected in the selection area of the dialog box, and then click Next.
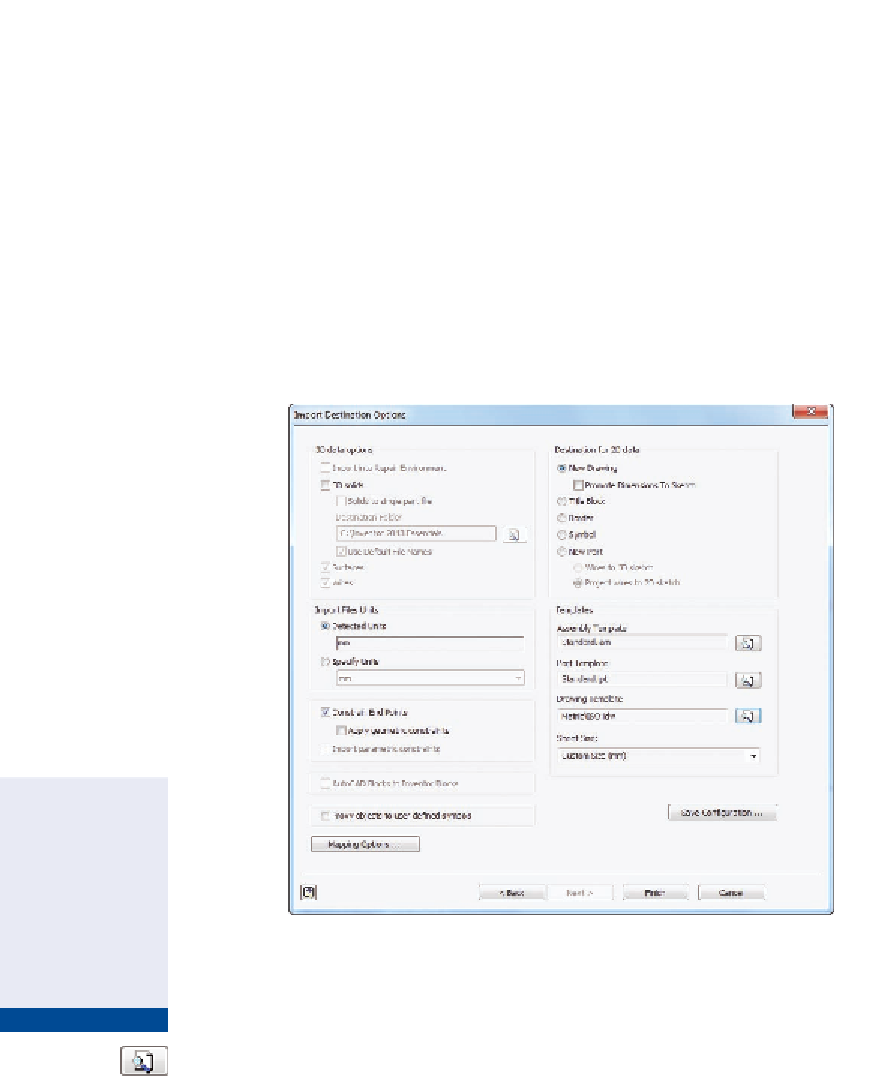
8.
In the Import Destination Options dialog box (Figure 14.3), make sure
the Constrain End Points option is selected and that the Destination
For 2D Data value has New Drawing selected.
Selecting Mapping
Options in the dialog
box allows you to
sort AutoCAD lay-
ers into separate
Inventor sketches.
You can also choose
to put all geometry
into one sketch.
FIGURE 14.3
There are many options when converting AutoCAD
data into Inventor data.
9.
In the Templates group, click the icon to browse for a drawing
template.
10.
Double-click the
ISO.idw
template on the Metric tab.
11.
Click Finish when you return to the Import Destination Options
dialog box.
Search WWH ::

Custom Search