Graphics Programs Reference
In-Depth Information
Making a Movie of the Assembly
It used to be that making an animation required another application besides the
engineering tool. Translating the engineering data to the animation tool was dif-
ficult, and the animations often ended up being out-of-date because they couldn't
be linked to the latest design changes. Inventor bridges that gap.
Creating the Timeline and Using the Camera
Camera changes in Inventor Studio can be as advanced as having the camera
move along a path as it follows another path. But simple changes can add flair to
an animation as well.
Certification
Objective
1.
Verify that the 2013 Essentials project file is active, and then open the
c13-06.iam
file from the
Assemblies\Chapter13
folder.
2.
Open the Environments tab, and click the Inventor Studio icon in the
Begin panel.
TIP
Inventor can create multiple animations using different cameras,
moving parts, and other variables. To keep track of it all, you have to create
an animation within the file.
3.
Click the Animation Timeline tool in the Animate panel on the Render
tab to create a new animation, and click OK to confirm that Inventor
Studio will activate the new animation.
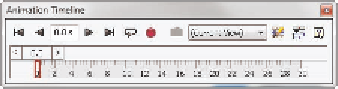
The Animation Timeline (Figure 13.15) appears across the bottom
of the Design window. Toward the right is a drop-down displaying
the use of the current view for the animation.
The Video Producer
tool in the Animate
panel can combine a
series of cameras to
create a video. These
videos can include
several types of
transition between
camera positions.
FIGURE 13.15
The Animation Timeline
is the main resource for editing animations.
4.
Click this to make the Essentials 1 camera the active camera for the
animation.
5.
Just to the right of the drop-down is the Animation Options icon.
Click it to open the Animation Options dialog box.


Search WWH ::

Custom Search