Graphics Programs Reference
In-Depth Information
Creating Renderings and Animations
The presentation file is a great way to quickly communicate with others how your
product needs to be built. You can also use the engineering data to interest people
in buying your product, but that requires a much higher-quality output. It's time
to look at some of the tools of Inventor Studio. These tools give you advanced ren-
dering and animation capabilities and additional types of renderings.
Creating a Still Image
You can render any part or assembly file. The easiest way to do this uses the
Realistic visualization mode on the View tab. To have more control, you need to
enter the Inventor Studio environment.
Certification
Objective
1.
Verify that the 2013 Essentials project file is active, and then open the
c13-02.iam
file from the
Assemblies\Chapter13
folder.
2.
Make the Environments tab active.
3.
Click the Inventor Studio icon on the Begin panel to enter the
Inventor Studio environment.
Like the Sketch tab, a contextual Render tab will be highlighted
because it is a temporary environment, and you cannot do modeling
tasks while in the environment.
4.
Click the Render Image icon in the Render panel on the Render tab
or in the marking menu to open the Render Image dialog box.
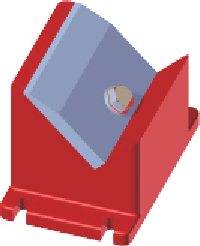
5.
Without changing any options, click the Render button. After the
rendering is finished, it appears like Figure 13.6.
6.
Close the Render Output window.
FIGURE 13.6
The initial
rendering


Search WWH ::

Custom Search