Graphics Programs Reference
In-Depth Information
each. A preparation can be an extrusion, revolved feature, hole, fillet chamfer, or
sweep. The most common is the chamfer.
1.
Make certain that the 2013 Essentials project file is active, and con-
tinue using or open
c12-02.iam
from the
Assemblies\Chapter12
folder.
2.
To access the Preparation tools, click the Preparation tool in the
marking menu or the Process panel of the Weld tab.
This step makes tools available in the Ribbon and also changes the
Browser to show that these changes are added under the Preparations
folder, not to the components in the assembly.
3.
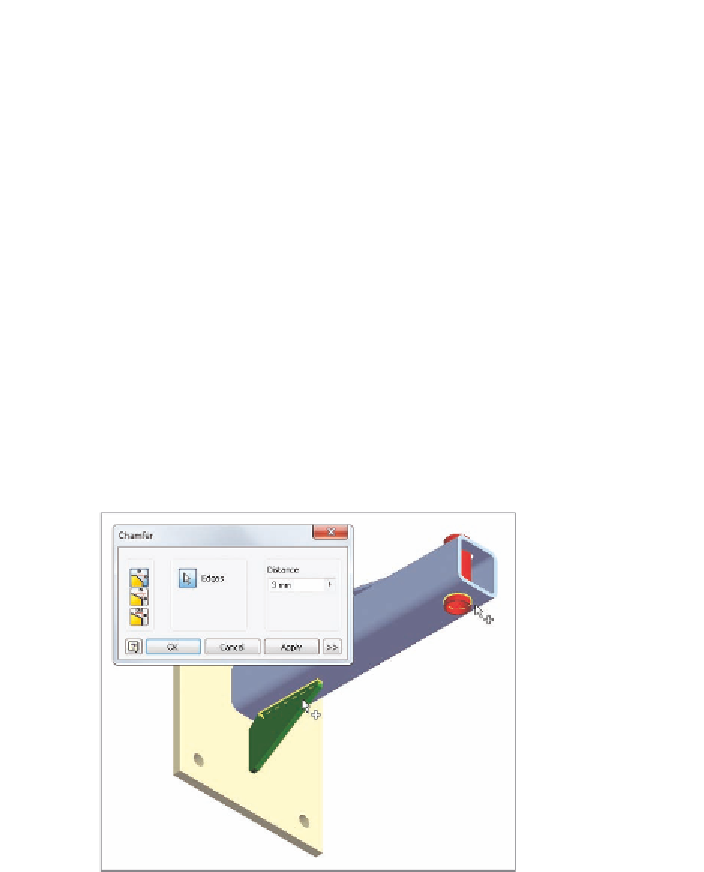
Click the Chamfer tool on the Weld tab in the Preparation And
Machining panel.
4.
Set the distance to 3 mm, and click the three edges highlighted in
Figure 12.3.
FIGURE 12.3
Adding a chamfer to edges to
prepare for the weld
5.
Click OK to add the chamfers to the components.
6.
Click Return from the Ribbon to leave the Preparation tools. Figure 12.4
shows the results.
Now that you've added the preparation features you need, you can begin to
add some welds to the assembly.


Search WWH ::

Custom Search