Graphics Programs Reference
In-Depth Information
2.
In the Browser, expand the Solid Bodies folder.
3.
Right-click the icon next to Solid1, and uncheck Visibility to turn off
the solid model.
4.
Start the Stitch tool from the Surface panel of the 3D Model tab.
5.
Click the extruded surface and the boundary patch; then click Apply
to create the new surface.
6.
Click Done to close the dialog box.
7.
Make the solid visible again.
8.
Start the Sculpt tool, and select the new surface.
9.
Switch to the Remove option.
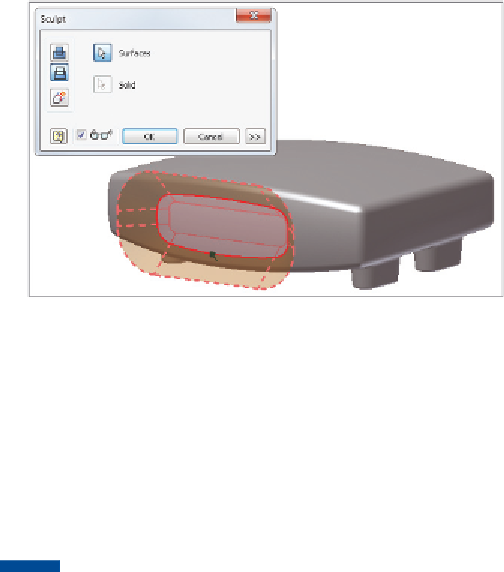
A preview appears showing the portion to be removed in red
(Figure 9.3).
FIGURE 9.3
The Sculpt tool can also remove a portion of
the solid using a surface.
10.
Click OK to finish editing the part.
If you have a series of surfaces that meet at their edges, you can stitch them
together into a solid. It will work, but cleaning up the edges of the surfaces is
more difficult than allowing them to overlap and using the Sculpt tool.
TIP
You can turn a single part into separate bodies representing and
even defining the multiple parts of an assembly. By forming these various bod-
ies using the same geometry, you can maintain the consistency of their shapes.


Search WWH ::

Custom Search