Graphics Programs Reference
In-Depth Information
3.
Select the top face of the revolved feature for a plane to place the
cylinder on.
This will automatically project the geometry of that face including
the centerpoint of the concentric circles.
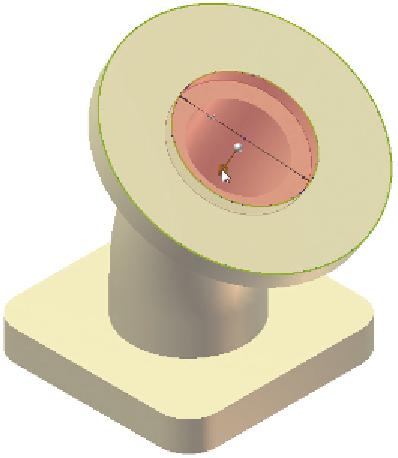
4.
Pick the center of the circles for the center of the cylinder and drag
the diameter.
5.
Enter a diameter of
55
, and hit Enter.
This automatically switches the view position of the model and
starts the Extrude tool.
6.
Drag the distance arrow down and back into the part to convert the
operation from a Join to a Cut, as shown in Figure 3.24.
7.
Set a depth of 5 mm, and click OK to place the new feature.
FIGURE 3.24
Primitives accelerate the process
of creating basic shapes.
Looking at the browser, you won't see a special feature callout, and editing
the extrusion that was created is no different from if you had gone through the
process step by step. As with many of the most productive tools in Inventor, this
is just an easier way to do things that allows you to stay focused on what you're
creating, not how you're creating it.
Search WWH ::

Custom Search