Game Development Reference
In-Depth Information
Putting it all together
Now that we have developed the classes necessary for the
InventoryMgr
,
Mis-
sionMgr
, and
InteractiveObj
systems, let's build a scene that illustrates their
functionality.
the Three Cs of 3D Games
, where we left off. Load the scene and save a copy
named
chapter2
.
2. Add an instance of
InventoryMgr
to the
Player
GameObject by dragging-
and-dropping it from the
Project
tab to the
player
object. Alternatively, click
on
Player
and select
Add component
from the
Inspector
pane. Type in the
name
InventoryMgr
and then click on it to add an instance.
3. Click on
Player
and ensure that the
Tag
is set to
Player
. The
Interact-
iveObj
class will use this to make sure they can only be picked up by the
player.
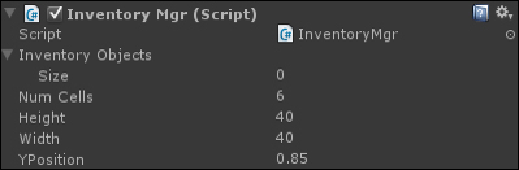
4. Set
Height
and
Width
to
40
pixels to make the individual cells square shaped.
Set the
Yposition
to
0.85
to indicate a
y
coordinate of 85 percent from the top
of the screen.
5. Create a new empty GameObject and name it
MissionMgr
. Attach the
Mis-
sionMgr
script to this object. We purposely detach this script from the player
because the lifespan of
MissionMgr
may differ from the player object.
The results of all the discussed settings are shown in the following screenshot: