Information Technology Reference
In-Depth Information
IV
To turn on your new plug-in, click the Activate link. Some plug-ins have settings. If you don't see a
Settings link on the Manage Plugins page, go to the main Settings page; click Settings from the left
navigation pane. Your plug-in should have a link listed there somewhere.
When setup is complete, give your plug-in a test spin. If all is well, tell your visitors all about what
you've added and how well it works. If you're so inclined, go back to the WordPress Plugin
Directory and rate the plug-in, too.
Managing and Updating Plug-Ins
All software changes sooner or later, and it's true of WordPress plug-ins, too. Bugs get fixed; new
functionality is added. As with WordPress core itself, the Plugin Directory tracks updates for the
plug-ins stored there.
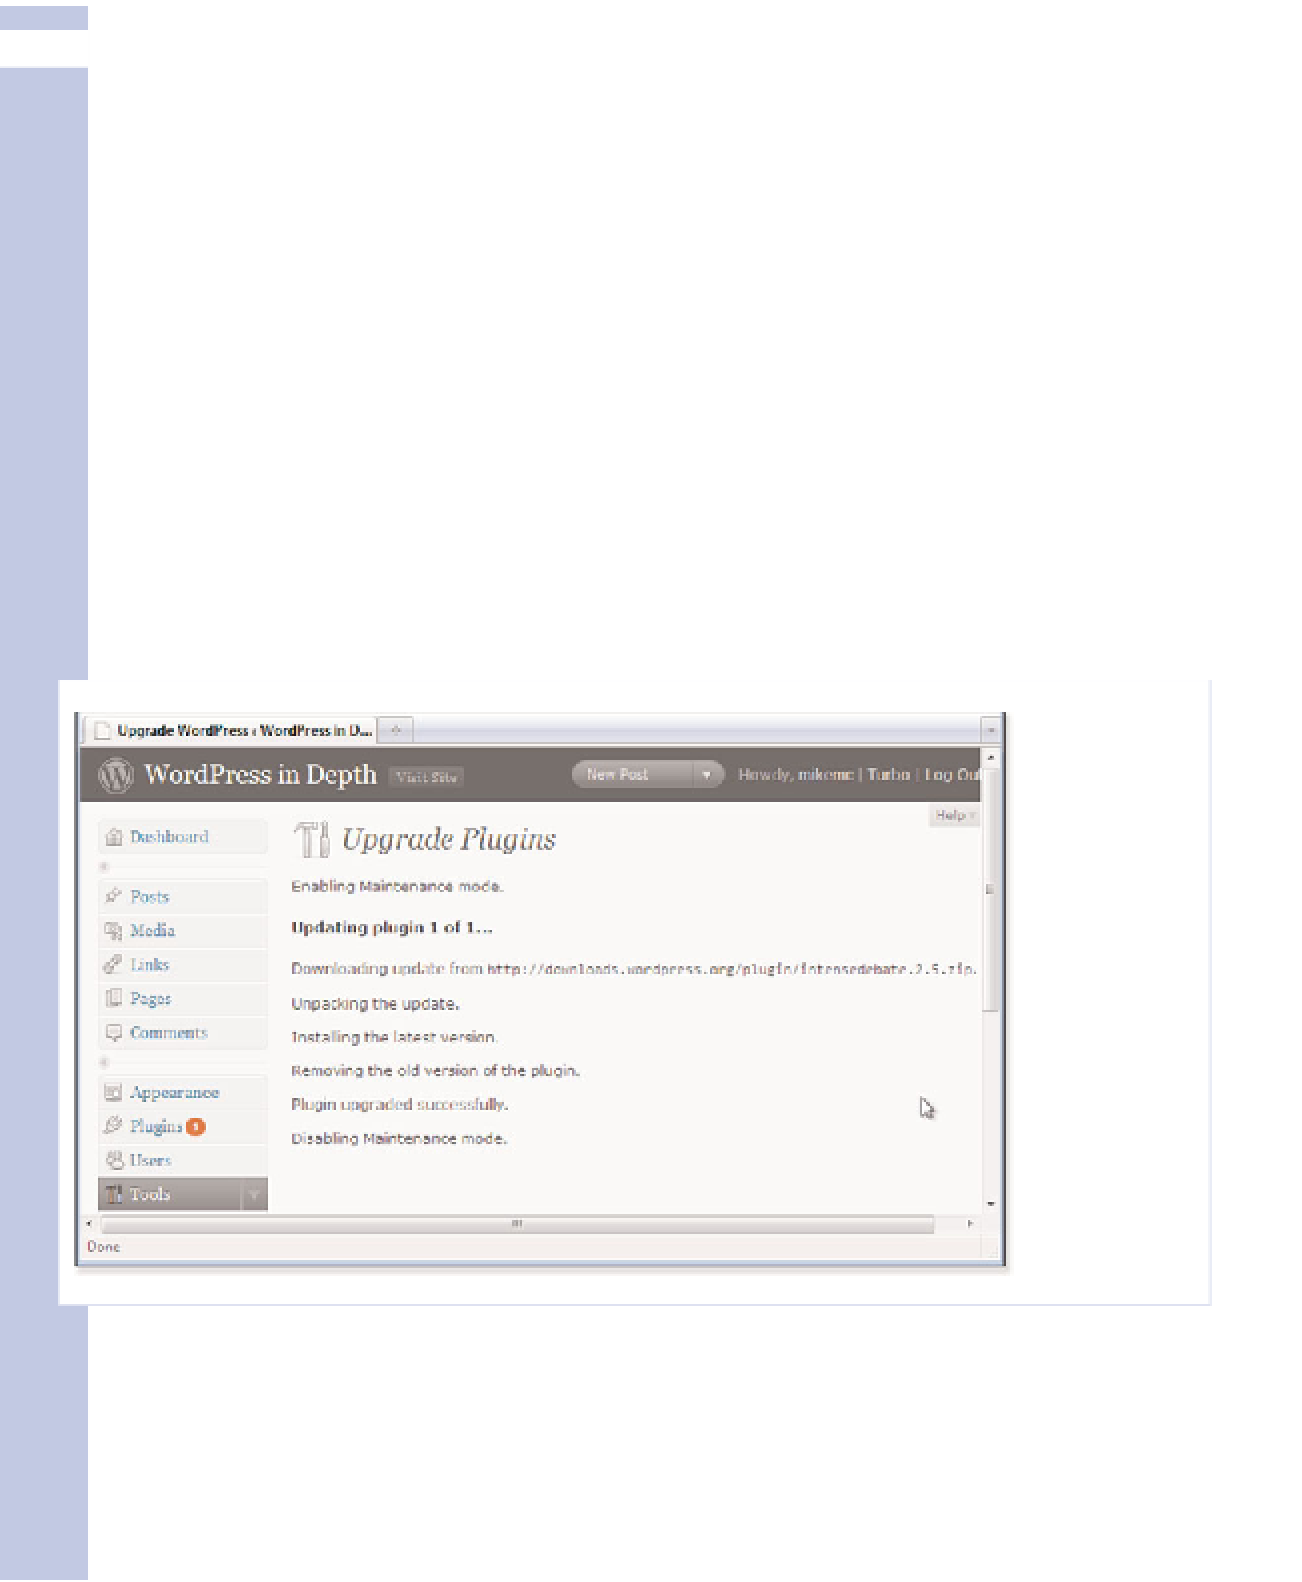
When a plug-in is updated, you should see news of the fact on your Manage Plugins page, just as
when there's a WordPress update. There's also notification in the navigation pane. As always,
before making any substantive change to your WordPress installation, back up your database. To
install the update, just click the Upgrade link on the page. WordPress downloads the upgrade,
extracts the new plugin code, and reactivates the plug-in. The upgrader then displays the results,
as in Figure 13.4.
Figure 13.4
Upgrade
plug-ins
automatically
from your
Administra-
tion page.
Prior to version 2.9, if more than one plug-in had an update, you had to run each update separately.
No more! When you see that more than one plug-in has an update, go to Tools, Upgrade from the
navigation bar. Check the Select All box (as in Figure 13.5), then click Upgrade Plugins. You still
have the option to update each plug-in separately, if you want to hear more about each update
before committing.