Graphics Reference
In-Depth Information
2.
Different layouts •
Now let's look at the actual layouts. We draw another rect-
angle, this time with the dimensions of the specific target layout. It is best to
start with the biggest one, so this rectangle will have a dimension of 350 x
1200 pixels. Since we will let Edge Commons handle the positioning of each
layout later on, we must save the layouts as symbols in the Library so that
they can automatically be generated at runtime. To do this, we change the
rectangle you just created into a symbol. Double-click the symbol to display
the layout. We can now place our texts and graphics. Since a symbol offers
us an additional Timeline separate from the Stage Timeline, we can also
create animations within the symbol. Once you are done with the layout,
you can click out of it and return to the Stage. The symbol can now be safely
deleted from the Stage since it is retained in the Library. Repeat this process
for all layouts. In this example, you should create three symbols with the
following widths: 400 px, 600 px and 800 px.
3.
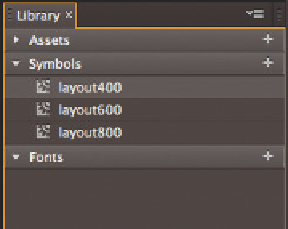
Naming symbols •
Since Edge Commons automatically places the symbol
on the Stage according to the current browser width, you have to give the
symbols unique names that are recognized by Edge Commons. Rename
the symbols as follows: layout + the width of each layout. In our case, the
symbol names are layout400, layout600 and layout800.
4.
Download Edge Commons •
The creation of the layout is now complete, so
let's work on the extension. Edge Commons must be loaded when the com-
position is loaded in the browser so that the right layout can be displayed
immediately. This can be done by either using the online version of Edge
Commons or using the download version and saving it in the project folder.
In this example we will use the latter and save the Edge Commons 0.5.0.js
file in the /libs directory.


