Graphics Programs Reference
In-Depth Information
●
While you are here, you can also start to rework the thigh strap to make
it appear more like a belt. Again, reuse pieces from the main strap model
you created.
●
Continue the main strap so it hangs down onto the thigh and ends back up at
the rear of the belt. It would be useful to have the trouser model in the scene,
so we don't end up with the strap sitting inside the model (Figure 10.38c).
●
Before creating the holster, add in some more details onto the thigh strap
to make it look more like a belt (Figure 10.38d).
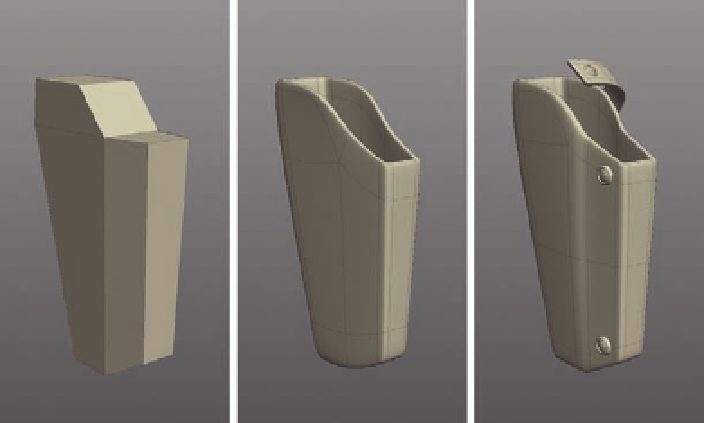
Take a break now and create the actual gun holster. As you can see in Figure
10.39, the holster is a simple shape.
●
Start with a cube and adjust it to create the basic holster shape (Figure
10.39 a).
●
Next, create the hole where the gun will sit in the top and then
Bevel
the
edges so the holster keeps its shape when subdivided (Figure 10.39b).
●
Finally, add some details in the form of a small strap and studs, something
similar to Figure 10 39c.
Bring the holster into the same scene as your belt, making sure you delete
the trousers if they are still in the scene. You should now have something like
Figure 10.40 .
(You can i nd the Silo scene created in this section in Chapter10/Files/10_
BeltAndHolster.sib.)
Glove and Boot Details
To complete the main clothing details, we will adjust the glove and boot
straps, turning them into belts. You have done this already with the belt and
holster, so these steps will be familiar to you.
Create the main gun
FIG. 10.39
holster.