Graphics Programs Reference
In-Depth Information
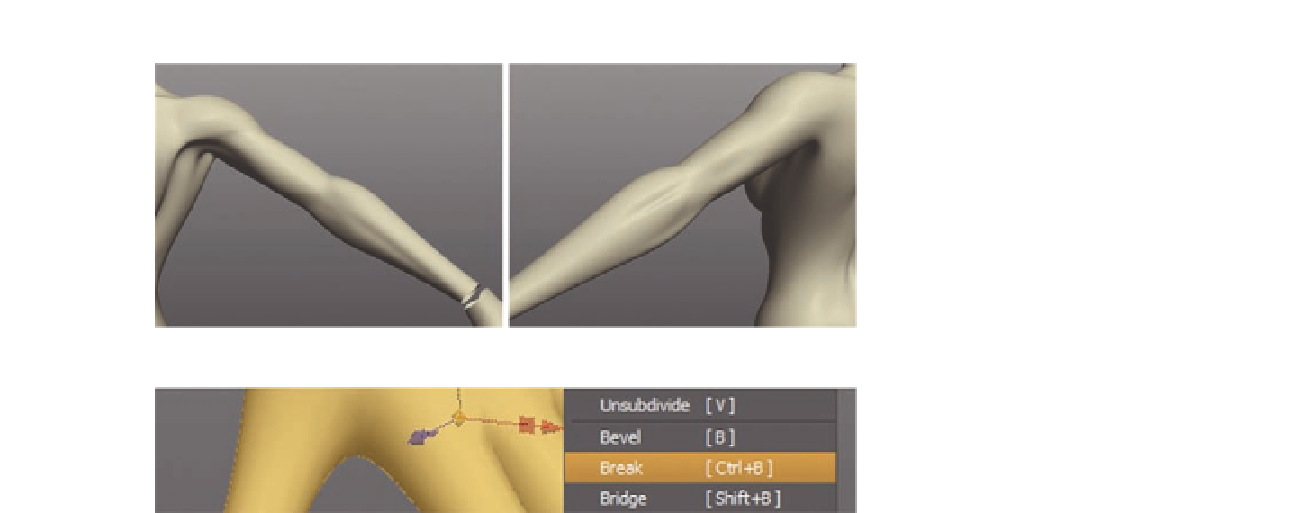
FIG. 7.58
The i nished arm.
FIG. 7.59
Separate the hand from the
rest of the model.
time, though, instead of adding each edge loop we will add the geometry
globally.
First, we need to separate the hands; we do this so we do not accidentally
increase the geometry on the rest of the body.
●
Select all the faces of the hand.
(Tip: A quick way to select the components on a whole object is to select a
single face and then press
Ctrl
1
. This will select the entire shell.)
●
Next, right click and select
Break
from the context menu (Figure 7.59). This
will separate the selected faces from the main model, making the hands a
unique object.
Now the hand is a separate entity, so we can begin work.
As you can see from Figure 7.60a, the current hand is very boxy. For us to see
it in a smoother state, we need to apply a subdivision. However, this does
not give us more geometry to play with. Silo allows us to “bake” the current
subdivision onto the model, leaving the geometry intact and editable.
●
Select the hand model and press
C
to subdivide it once (Figure 7.60b).
●
Now, with the hand selected, go to
Subdivision
>
Rei ne Control Mesh
( Figure 7.61 ).
As you can see from Figure 7.60c, this retains the subdivision, but bakes the
geometry, allowing you to then edit it afterward. So now, we have a much
better starting position for the hand model.
●
Now that we have the model subdivided, let's reshape it slightly to take
full advantage of the new topology (Figure 7.60d).