Graphics Programs Reference
In-Depth Information
●
Create two more
Cuts
next, connecting the previous cuts with the vertices
below them (Figure 6.35d).
●
This leaves us with one more triangle. To remove it, select the four edges
to its side and hold
B
t o
Bevel
them.
●
Remember to delete any new, unwanted edges created by the bevel so
your back's topology is clean (Figure 6.35f ).
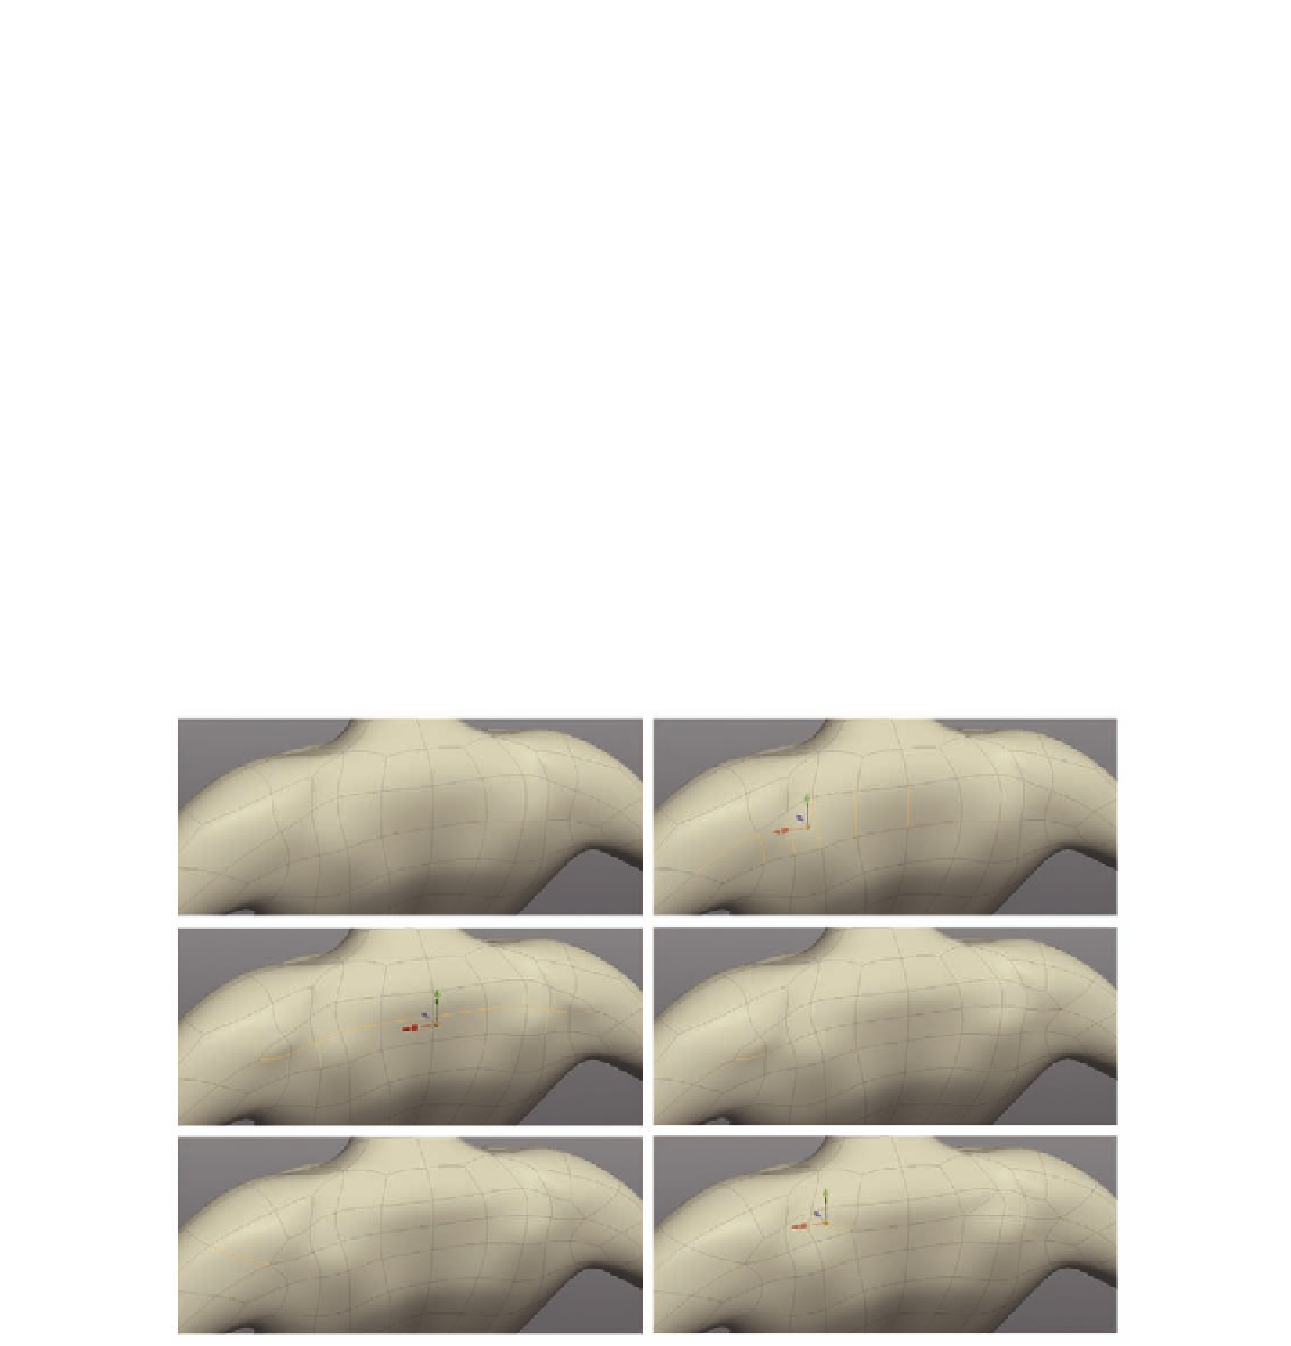
Let's focus on her upper shoulders next. In Figure 6 36a, we can see an n-gon
on the back of her shoulder that needs to be addressed .
●
Select the edge opposite the n-gon, and the ring of edges l owing to the
spine ( Figure 6.36 b).
●
Cut
these (Figure 6.36c) and merge the lower edge of the triangle toward
the end of the cut (Figure 6.36d).
●
Now create another
Cut
, this time across the n-gon on the shoulder,
dividing it and making two quads (Figure 6.36e).
One i nal thing to do before we move on is to change the topology slightly,
and reroute the direction of the polygons.
●
Cut the polygon shown in Figure 6 36e, select the edge you just made, and
Merge
it.
FIG. 6.36
Create a new cut, and adjust the topology to help remove the n-gon on the shoulder.