Graphics Programs Reference
In-Depth Information
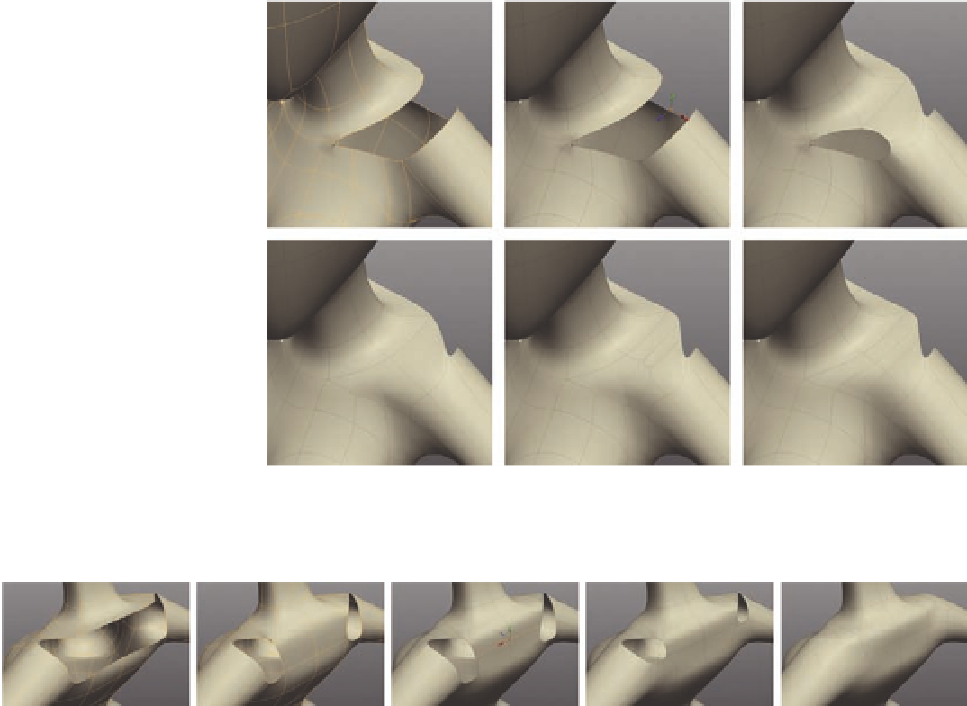
FIG. 5.104
F ill in the front shoulders.
FIG. 5.105
Start to fi ll in the back of her shoulders.
(Note: If symmetry was enabled, you will i nd that both shoulders were
completed. If it wasn't, you can easily delete half the model and perform a
Mirror Geometry operation as we did earlier in the chapter to update the
opposite side.)
Spin the model around, and now let's work on the back of her shoulders.
●
Start in the center and create a
Bridge
between the upper and lower
edges to build the two large faces seen in Figure 5.105b.
●
Next, split these faces by selecting the vertical edges and pressing
Alt
X
to cut them (Figure 5.105c).
●
Now that we have this extra split, we can create another
Bridge
from the
lower polygon on her back to the one opposite on the arm
( Figure 5.105d ).
●
For the remaining hole, use the
Fill Hole tool
to i ll it. This will give us a
large n-gon, but we can divide it next.
●
Moving on to Figure 5.106 , create a new
Cut
across the two central
polygons of the upper back (Figure 5.106b).