Graphics Programs Reference
In-Depth Information
1.
In the Develop Module, click on the Adjustment Brush to reveal the tool
options.
2.
Select Auto Mask mode. This feature coni nes the brush strokes to areas of
similar color.
Tip:
Hold the Command key
(Mac)/Control key (PC) to
switch the Adjustment
Brush into Auto Mask
mode, or revert back to
Normal mode if Auto
Mask is already selected.
3.
For this example, I set the adjustment to “Exposure” and made some
dodging and burning adjustments as outlined in the previous exercise.
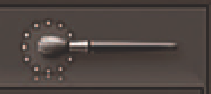
4.
After painting an area, hover the cursor over the dot to reveal the mask
area.
5.
After i nishing the main brush work, switch to Edit mode to i ne-tune the
settings.


Search WWH ::

Custom Search