Graphics Programs Reference
In-Depth Information
3.
Now select the Recovery slider, and move it to the right until the red
portions disappear; in the case of my image, I chose to continue moving
the slider to show even more highlight detail.
4.
Next move the Fill Light slider to the right, this will “dodge” the shadows.
Continue adjusting until you have your desired ef ect. If the image doesn't
have enough contrast, don't worry, we'll get there next.
5.
We'll now carefully move the Black slider to add true blacks back to the
image; move the slider until the blue overlay is just barely visible (too
much blue indicates clipped shadow regions).
If you'd like yet more contrast, the appropriately marked “Contrast” slider is
a good way to massage the details - remember to be mindful of the blue
overlays.
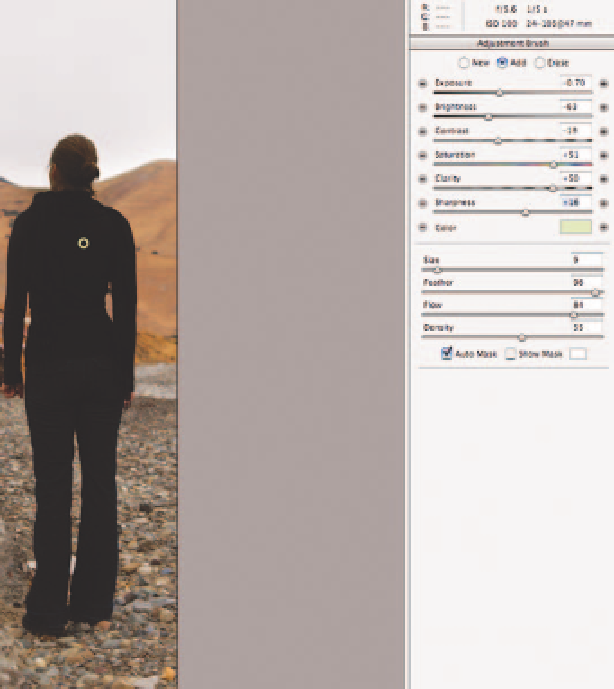
Step 4: New in ACR 5.0 are Selective Edits
These can be applied in two ways. Let's i rst look at brushes (K): these require
only that you paint a selected region and then adjust the parameters of that
area on the right side of the screen. Brushed areas can be added to (the
default behavior after one is made), created and supplemented (“New”) or
deleted (“Erase”). In this case I've auto-masked the i gure to make it more of a
dark, low contrast silhouette.

Search WWH ::

Custom Search