Game Development Reference
In-Depth Information
As you can see, all the class does is store five properties for an object: an identifier, position along the X axis,
position along the Y axis, a color, and a script to run when playing the scene. The difference between the editor and
player versions of the class is that the editor sets an identifier automatically, and the player doesn't need to store the
script code. The second step in creating a scene editor is adding a
View
class, which you'll call
GPTSceneEditorView
.
Aside from creating a formal design document, the best way to explain what the code will do is to look at a screenshot
of the result, such as Figure
12-1
.
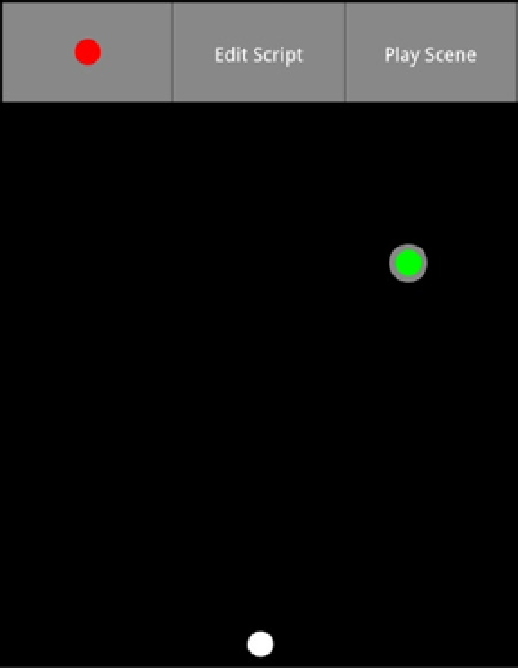
Figure 12-1.
A screenshot of the scene editor
Figure
12-1
shows the finished scene editor. The user interface has three buttons and an empty area that represents
the scene. The GUI button on the left shows the current color; every time a new object is added, its color is set to the
current color. Tapping on this button cycles between different colors. The middle button is for editing the selected
object's script. It brings up the
GPTScriptEditorView
. When users are done editing the scene, the button on the right
takes them to the scene player screen. Tapping inside the empty area adds a new object. If the tap is on top of an
existing object, it becomes the selected object. Selection is visually represented with a gray outline. Dragging works as
one would expect it to: the selected object is moved to the desired location.
Because the main focus of this chapter is the scripting engine, code for the
GPTSceneEditorView
and
GPTScriptEditorView
classes has been omitted from these pages. As an exercise, feel free to implement those classes