Graphics Programs Reference
In-Depth Information
this area of Photoshop. Selecting the
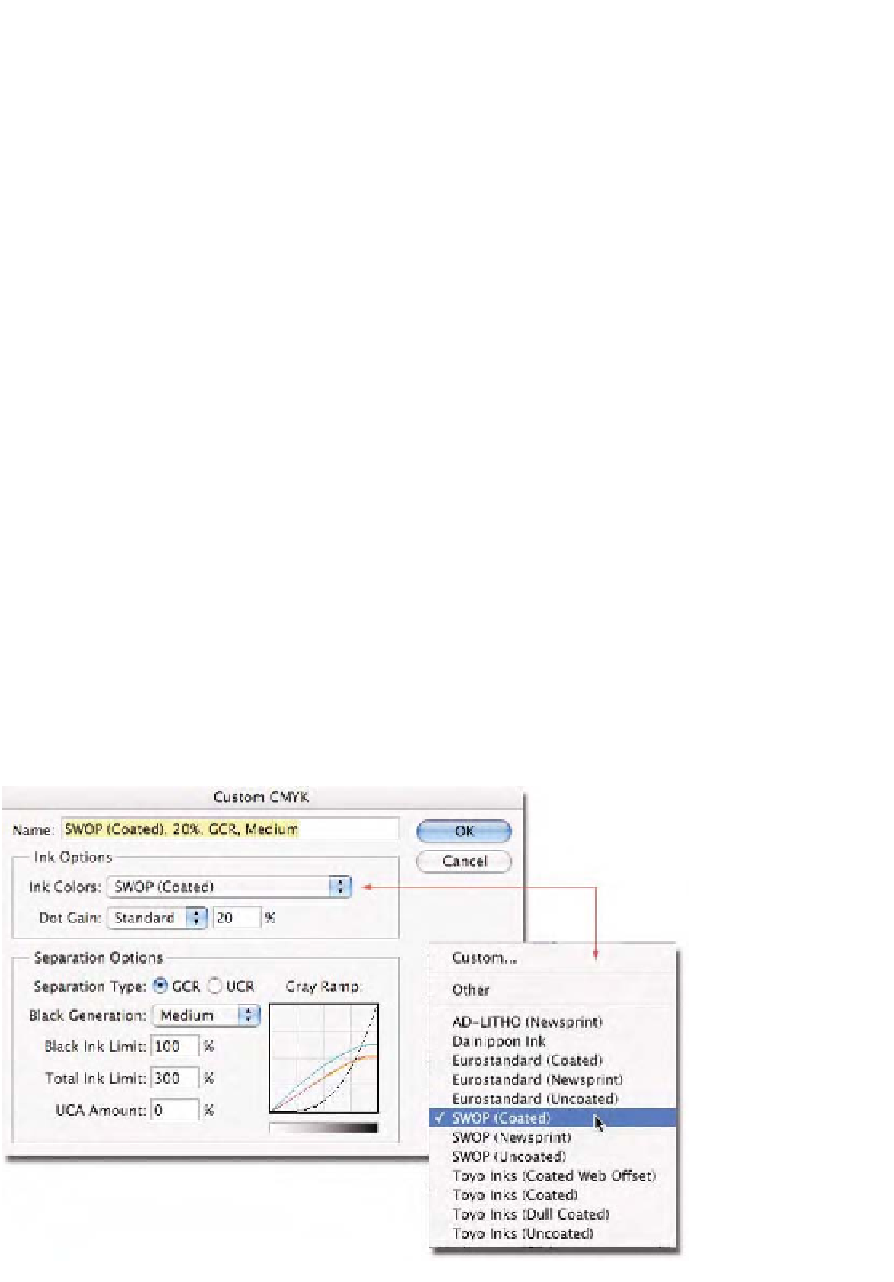
Custom CMYK
option calls up the
dialog box seen in Fig. 2-8. This somewhat scary-looking dialog is what
most color geeks call the
Classic CMYK engine
or
Built-In
CMYK settings.
This dialog dates back to Photoshop 2.0. This dialog box is not based upon
the use of ICC color management although once a user configures the
options seen here, the results can be saved as a CMYK ICC profile. Note
that the classic settings and the supplied CMYK ICC profiles seen in the
CMYK pop-up menu are
not
the same, although they might share the
same names. Setting the
Ink Colors
in the Classic CMYK dialog to SWOP
(Coated) is not the same as using the U.S. Web Coated (SWOP) v2 ICC
profile. That being said, I'll discuss this dialog with the caveat that you
may want to skip over this until you have read Chapter 7, which dis-
cusses areas such as Black Generation, UCR, GCR, and dot gain in detail.
The Custom CMYK dialog has two main areas:
Ink Options
and
Sepa-
ration Options
. A user is assumed to know what settings to enter for all
the items in this dialog, after which, a CMYK conversion can be carried
out using the classic CMYK engine. As we'll uncover in Chapter 7, this
is an assumption fraught with potential problems. The
Ink Colors
area is
where I can tell Photoshop what type of printing process will be used.
The 12 options tell Photoshop about the inks for the printing process
based upon some preset, industry definitions. If I know that the printer
is conforming to SWOP inks and SWOP standards, the ink model to pick
would be SWOP. If I dare, a custom ink model can be created (see the
sidebar, “Custom Ink Settings in the Classic Engine”).
Below the ink model is a method to configure the dot gain using either
a preset value or by entering a curve. A conversation with the printer is
Fig. 2-8
The Custom
(sometimes known as the
Classic/Built in) CMYK
engine seen here is one
way to produce CMYK
conversions.


