Graphics Programs Reference
In-Depth Information
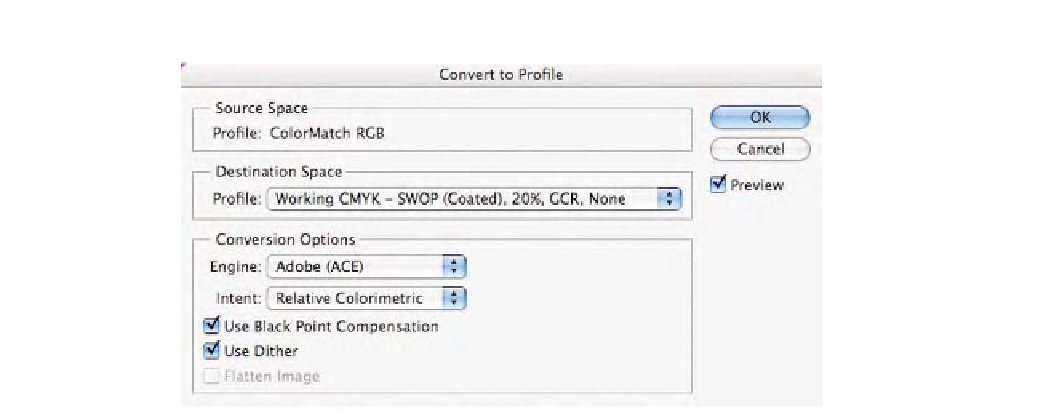
Fig. 9-14-3
The
Convert
to Profile
command
showing the custom CMYK
setting made in step 4.
8.
Using the
Text Tool
(click the letter
T
to select this), select a
font and type size and label this document
GCR None
somewhere on the image. We need to know which converted
file came from the original RGB document.
9.
Go back into the Color Settings, click the
CMYK
pop-up menu,
and select
Custom
as you did in step 2. Now change the
Black
Generation
pop-up to
Light
and click
OK
. Accept the new
color settings by once again clicking
OK
.
10.
Make the original RGB
Printer_Test_File.tif
the active
document; duplicate it as you did in step 6. Repeat step 7,
where you used the
Convert to Profile
command to produce
a conversion from ColorMatch RGB to CMYK using this GCR
light setting, and again using the
Type
tool, label this
document
GCR Light
.
11.
Repeat the steps of altering the
Black Generation
pop-up,
picking
Medium
,
Heavy
, and
Maximum
on duplicated
documents from the original RGB
Printer_Test_File.tif
,
convert to CMYK using the various GCR settings, and label the
documents with the
Text
tool. When completed you should
have the original RGB document and five CMYK files using the
five different GCR settings. Close the original
Printer_Test_File.tif
that was in ColorMatch RGB.
12.
With the five CMYK documents still open, select
Window-
Arrange-Tile
so you can easily examine the same area of
each CMYK file. What you will need to do is select each
document, one at a time, and examine just the Black
Channel. The quickest way to do this is to use the
Command/Control 4
key command. Command/Control and