Graphics Programs Reference
In-Depth Information
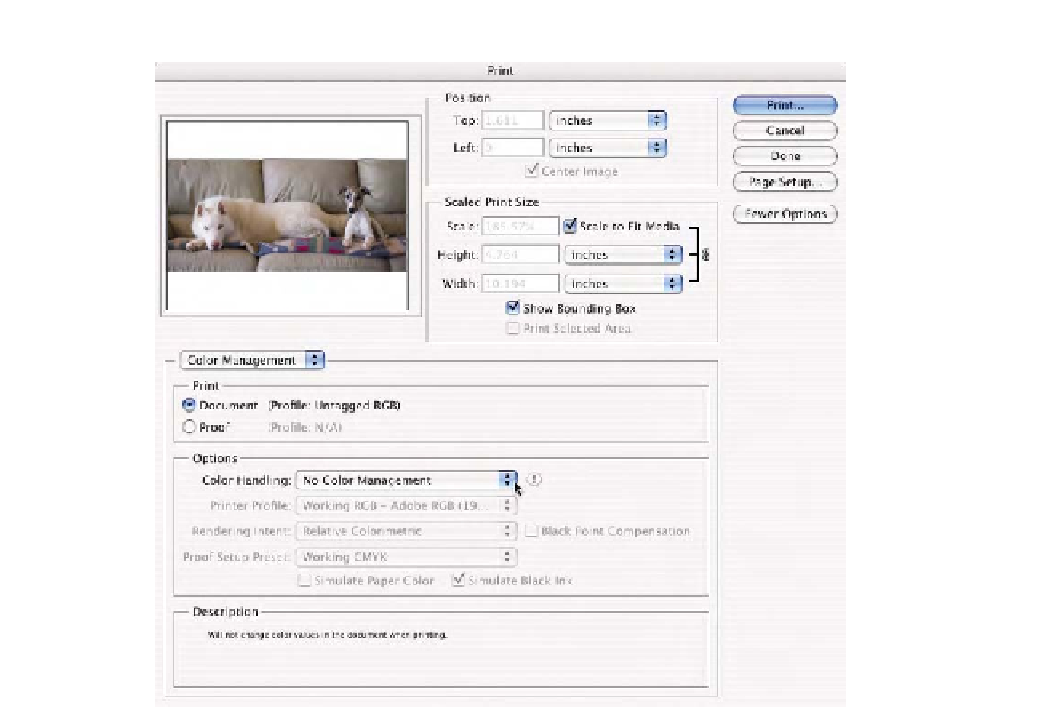
Fig. 2-28
Print with
Preview
in Photoshop CS2
with the
Color Handling
set to
No Color
Management
. Notice all
the options are grayed out
since this setting sends the
data directly to the print
driver. This is functionally
akin to the
Same as Source
setting in Photoshop CS.
Notice toward the bottom
of the dialog is a reminder
to enable color
management in the driver.
Also note that in this
example, the document is
untagged, which is
indicated next to the
Document
radio button.
rendering intent. This is accessed from the
Proof Setup Preset
pop-up menu
or a currently configured soft proof. This is how you can conduct a three-
way color space conversion. The rendering intent selected and saved in
this custom
Proof Setup
is used for the first color space conversion from
the document color space to this proof color space. Suppose you had a
Proof Setup
using the Working CMYK (U.S. Web Coated (SWOP) v2)
profile with the relative colorimetric intent selected. That output profile
and rendering intent is how the document-to-proof conversion will be
applied. Notice that in Fig. 2-29, the conversion is from ColorMatch RGB
to U.S. Web Coated (SWOP) v2. The cutout in Fig. 2-29 illustrates that
the conversion would be using the relative colorimetric intent based on
the
Customize Proof Condition
dialog. The secondary conversion would be
from U.S. Web Coated (SWOP) v2 to the actual printer. In this example,
I'm using an Epson 2200. The rendering intent in this part of the con-
version is handled with the two
Simulate
check boxes, seen below the
Proof Setup Preset
pop-up menu. These check boxes behave like the
Simulate
check boxes discussed in the
Customize Proof Setu
p. The main