Graphics Reference
In-Depth Information
Fig. 12.26
Fig. 12.27
Default view of qualified portions of an image.
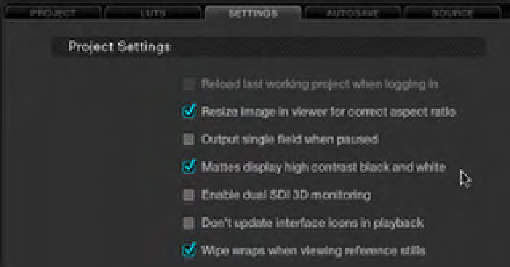
Fig. 12.28
Hi-con view of qualified portions of an image.
thumbwheels to richen the colors. Again, for this shot, it's prob-
ably not appropriate to pump up the greens, because this is
supposed to be a dangerous assault, not a golf documentary, but
this is an exercise to show that it can be done and how to do it.
Use the up and down arrow keys to enable or disable all nodes.
To sum up, we balanced the shot in our first node, vignetted the edges
in the second node, highlighted and tracked an actor in the third node,
and qualified a specific vector (the green of the grass) and punched it up
in the fourth node (
Figure 12.29
)
. We could have actually created them
in the order they ended up: grass, then actor, then vignette, but this order
gave you a chance to learn a little about the node graph.
The first node is the primary, the second node (4) is the grass qualifi-
cation and adjustment, the third node (2) is the vignette, and the fourth
node (3) is the tracked “hero” window.


Search WWH ::

Custom Search