Game Development Reference
In-Depth Information
Now when the player runs over the enemy, there will no longer be any weird
hiccups in the player's or enemy's movements. With that cleaned up, let's now make
the player die when it comes in contact with an enemy. For this, we are going to
create another empty GameObject with a Box Collider 2D component attached. We
will use another collider here so that each collider has a very specific job with very
specific collision requirements. It's actually somewhat rare that the same collider can
be used for multiple things simply because their positioning and sizing needs to be
different. I can say from the experience of working on two entirely separate "Beat 'em
up" games that each enemy usually has between three to five unique collision areas
such as feet rectangle, defense rectangle, and attack rectangle..
Thankfully, Unity makes all this collision madness very simple. Name that empty
GameObject
Defense Collider
and make it a child of the
Enemy
object at position
X: 0
,
Y: 0.29
. Resize the Box Collider 2D component so that it is about a quarter of
the size of the whole
Enemy
object, with a
Size
of
X:0.58
,
Y: 0.55
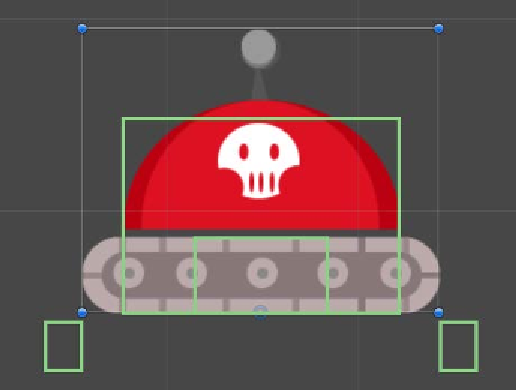
. The idea here
is that the player should be able to collide with the enemy, but if it's too precise, the
game becomes far too difficult. So, give a proper defensive collision range on the
enemy to allow the player some leeway to escape; refer to the following screenshot:
Let's add a new script that tells the enemy's
Defense Collider
GameObject to kill the
player on touching. Wait, we already have one of those! The beauty of Unity is that it
allows us to reuse scripts in surprising places. Make sure that the box collider on the
Defense Collider
object has its
Is Trigger
checkbox ticked, and then add the existing
DeathTriggerScript
to the
Defense Collider
object. Set the
Script
field in the
Inspector
panel of
Defense Collider
to
DeathTriggerScript
, and make sure that
the
Layer
drop-down menu is set to
Default
.