Game Development Reference
In-Depth Information
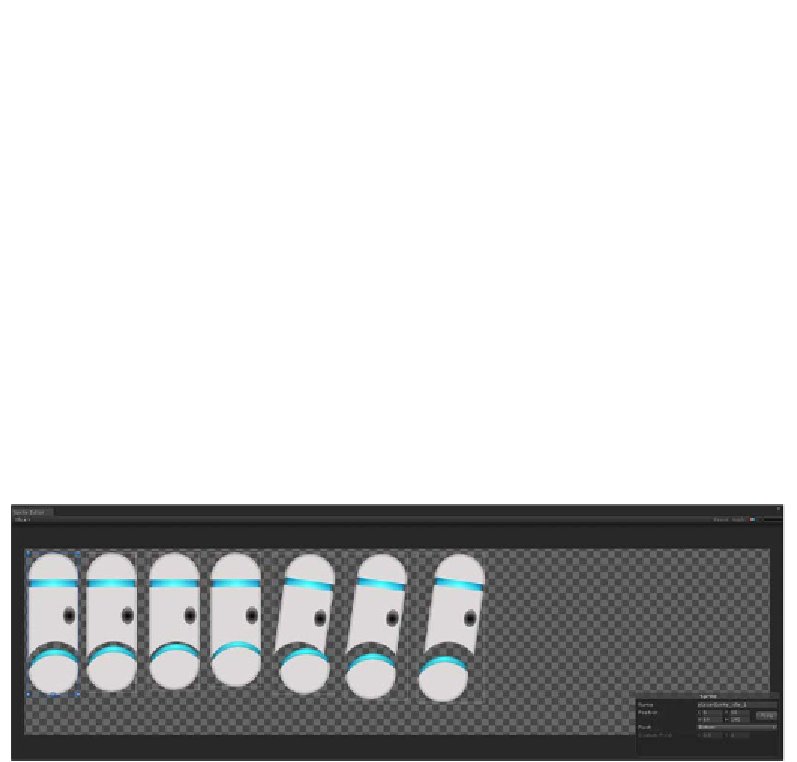
A shiny new dialog box will open, which will allow you to tell Unity what each
individual sprite is within this sprite sheet. Like most things in Unity, this is pretty
easy—simply click and drag the cursor around each individual sprite. This will draw
a box around each one! As you do this, a little sprite popup will be displayed in the
bottom-right of the
Sprite Editor
window, which gives you some precision controls
on the position of the sprite and allows you to change the pivot. You may also click
on the
Trim
button to help trim the box of any unneeded empty space around the
sprite, which will trim the sprite down based on the transparency of the sprite.
As you draw out the position for each sprite, you will want to make sure the pivot
is set for the bottom each sprite. Another option would be to go to the
Slice
menu
(top left), leave
Automatic
as the
Type
option, change the pivot to
Right,
and click
on the slice button. Think of this like the origin point of the sprite—it will rotate
from this point, react from this point, and exist from this point. You will also
want to set the name of the sprites to something clear. Name the first 4 sprites
playerSprite_idle_01
,
playerSprite_idle_02
,
playerSprite_idle_03
,
and
playerSprite_idle_04
, and the final three sprites
playerSprite_walk_01
,
playerSprite_walk_02
, and
playerSprite_walk_03
. With the sprites defined,
your
Sprite Editor
window should now look something like this:
When you are happy with how the sprite setup looks, click on the
Apply
button in
the top-right of the
Sprite Editor
window. You can also now close the
Sprite Editor
tab. In the
Project
tab, you'll notice that
playerSpriteSheet
now has individual
sprites for each of the sprites you just set up! You now have a properly configured
sprite sheet to use in the project.